Algorithm Presets Instructions
Desktop Tools
Tessonics Corporation has made every effort to ensure the accuracy and completeness of this document; however, because ongoing efforts are made to continually improve the capabilities of our products, we cannot guarantee the accuracy of the contents of this document. We disclaim liability for errors, omissions, or future changes herein.
Tessonics Corporation and its subsidiaries reserve the right to make changes, corrections, enhancements, modifications and improvements to its products and/or to this document at any time without notice.
Information in this document supersedes and replaces information previously supplied in any prior versions of this document.
Tessonics and the Tessonics logo are trademarks of Tessonics Corporation.
All other trademarks mentioned herein are the property of their respective owners.
©2007–2024 Tessonics Corporation. All rights reserved.
No part of this document may be copied, reproduced, or translated, without the prior written consent of Tessonics Corporation.
Algorithm Presets are for changing settings in the Algorithm settings page (these are advanced settings that are locked out from basic users). Multiple presets can be created such that a part template can have multiple settings. These presets can also be set for each weld location.
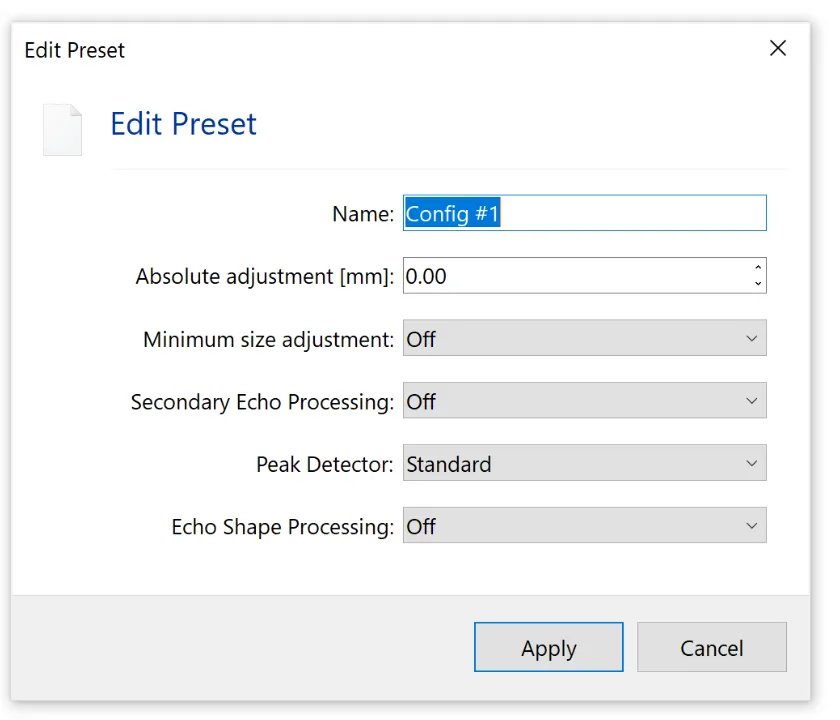
As an example, for a part named Part1, welds 1-3 could have a preset called Config #1 that will have its own preset configuration,
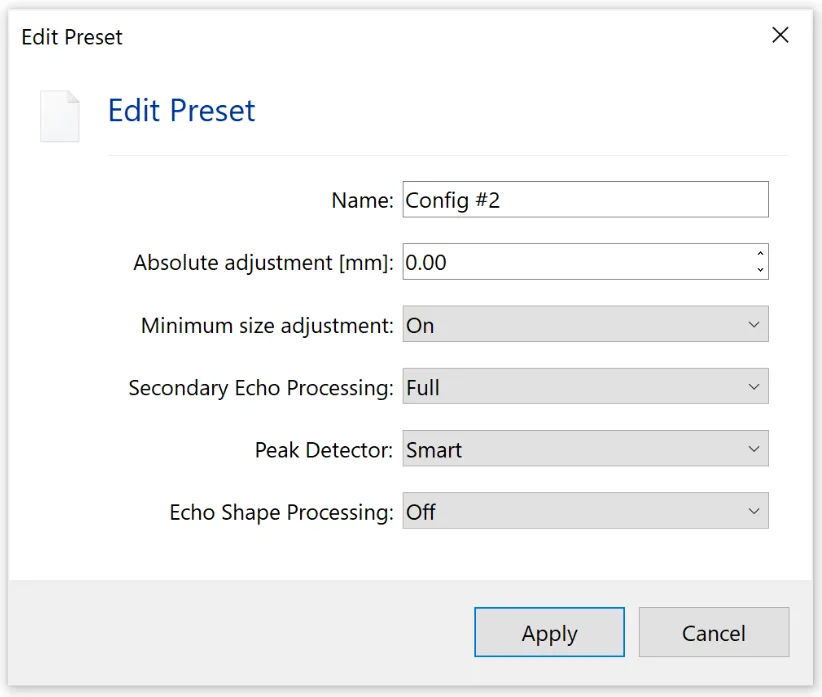
and the same part template could have a preset called Config #2 for welds 4-6 with a different configuration (listed below).
 {min-width=40%}
 {min-width=40%}
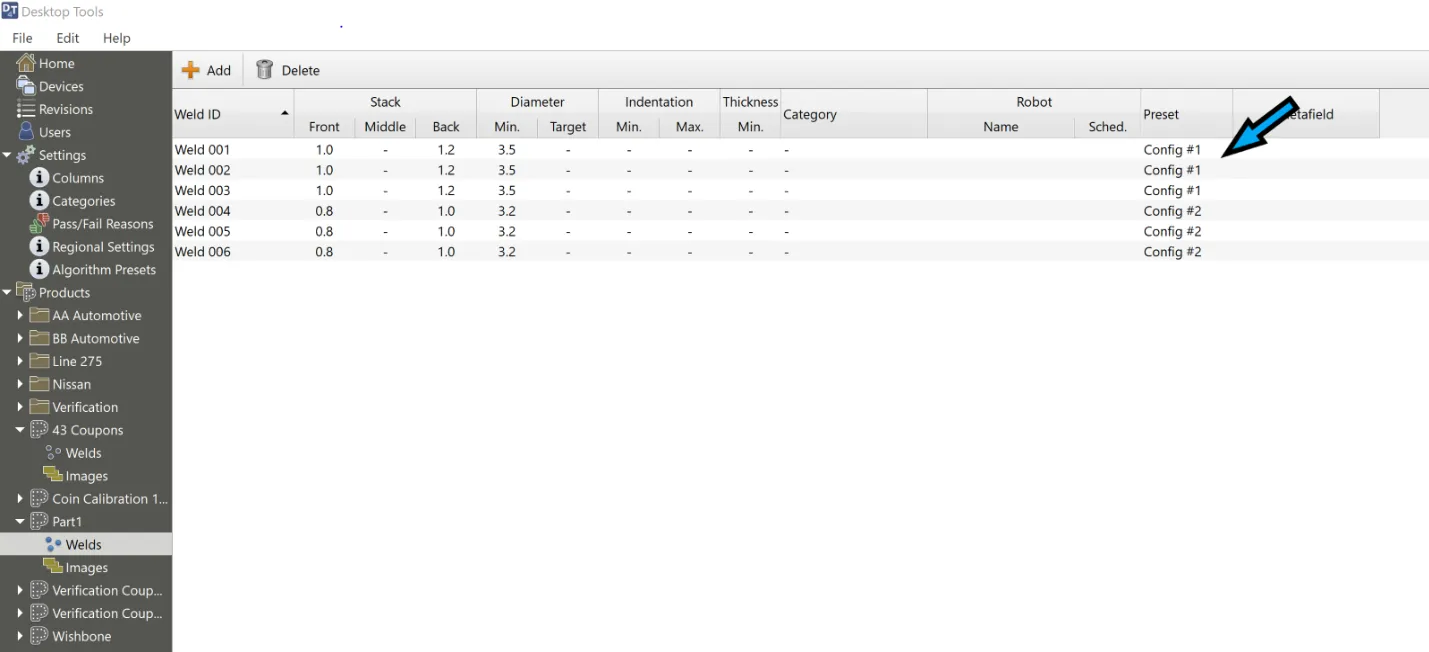
Then, inside the Part1 template, the presets are attached to each weld, as shown below.
 {min-width=65%}
Creating Algorithm Presets
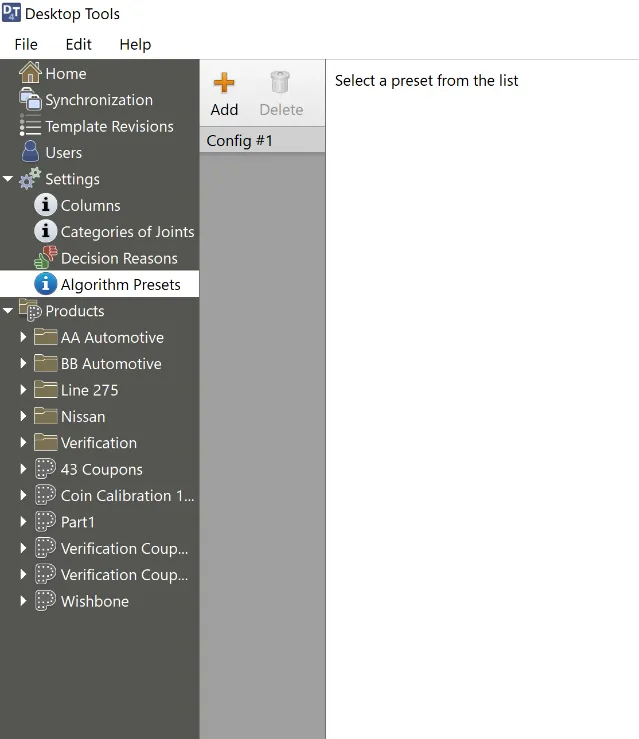
In Desktop Tools, go to Settings and click on Algorithm Presets, then click on Add Preset. A dialog box will open, where you will be able to name the Algorithm Preset Configuration and change the settings.
{min-width=40%}
To add another preset configuration, just click Add in the column with the listed configuration.
 {height=45% margin=0}
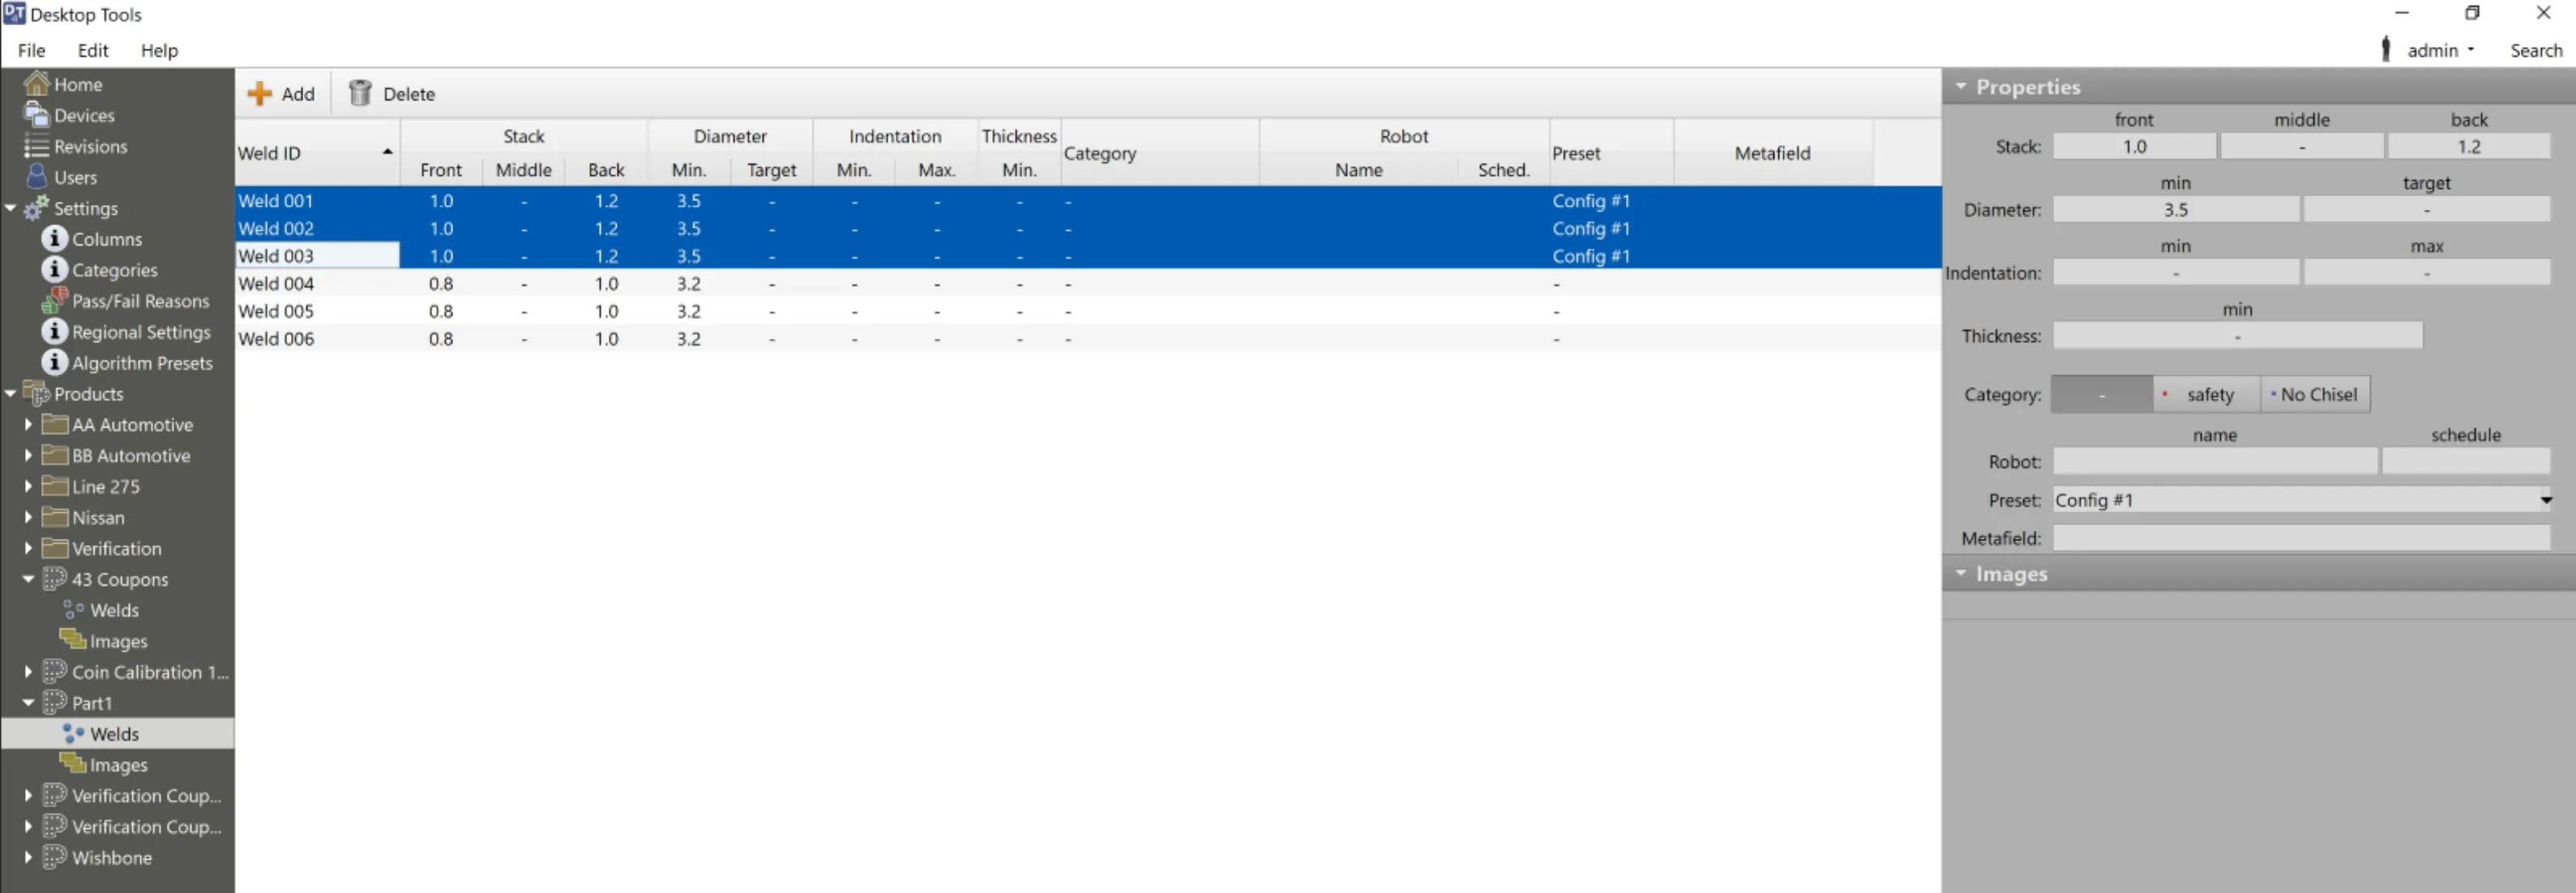
Once you have created all the different configurations needed, go to the part template welds listing and select the configuration for each weld in the Preset column.
You can do multiple welds at a time by highlighting the welds for one configuration and using the Properties box and selecting the Preset for those welds.
 {min-width=60%}
Note
If the Preset is not displayed in the Welds listing, you will need to go to Settings, then Columns and make surepreset_id is listed as Show and not Hide.