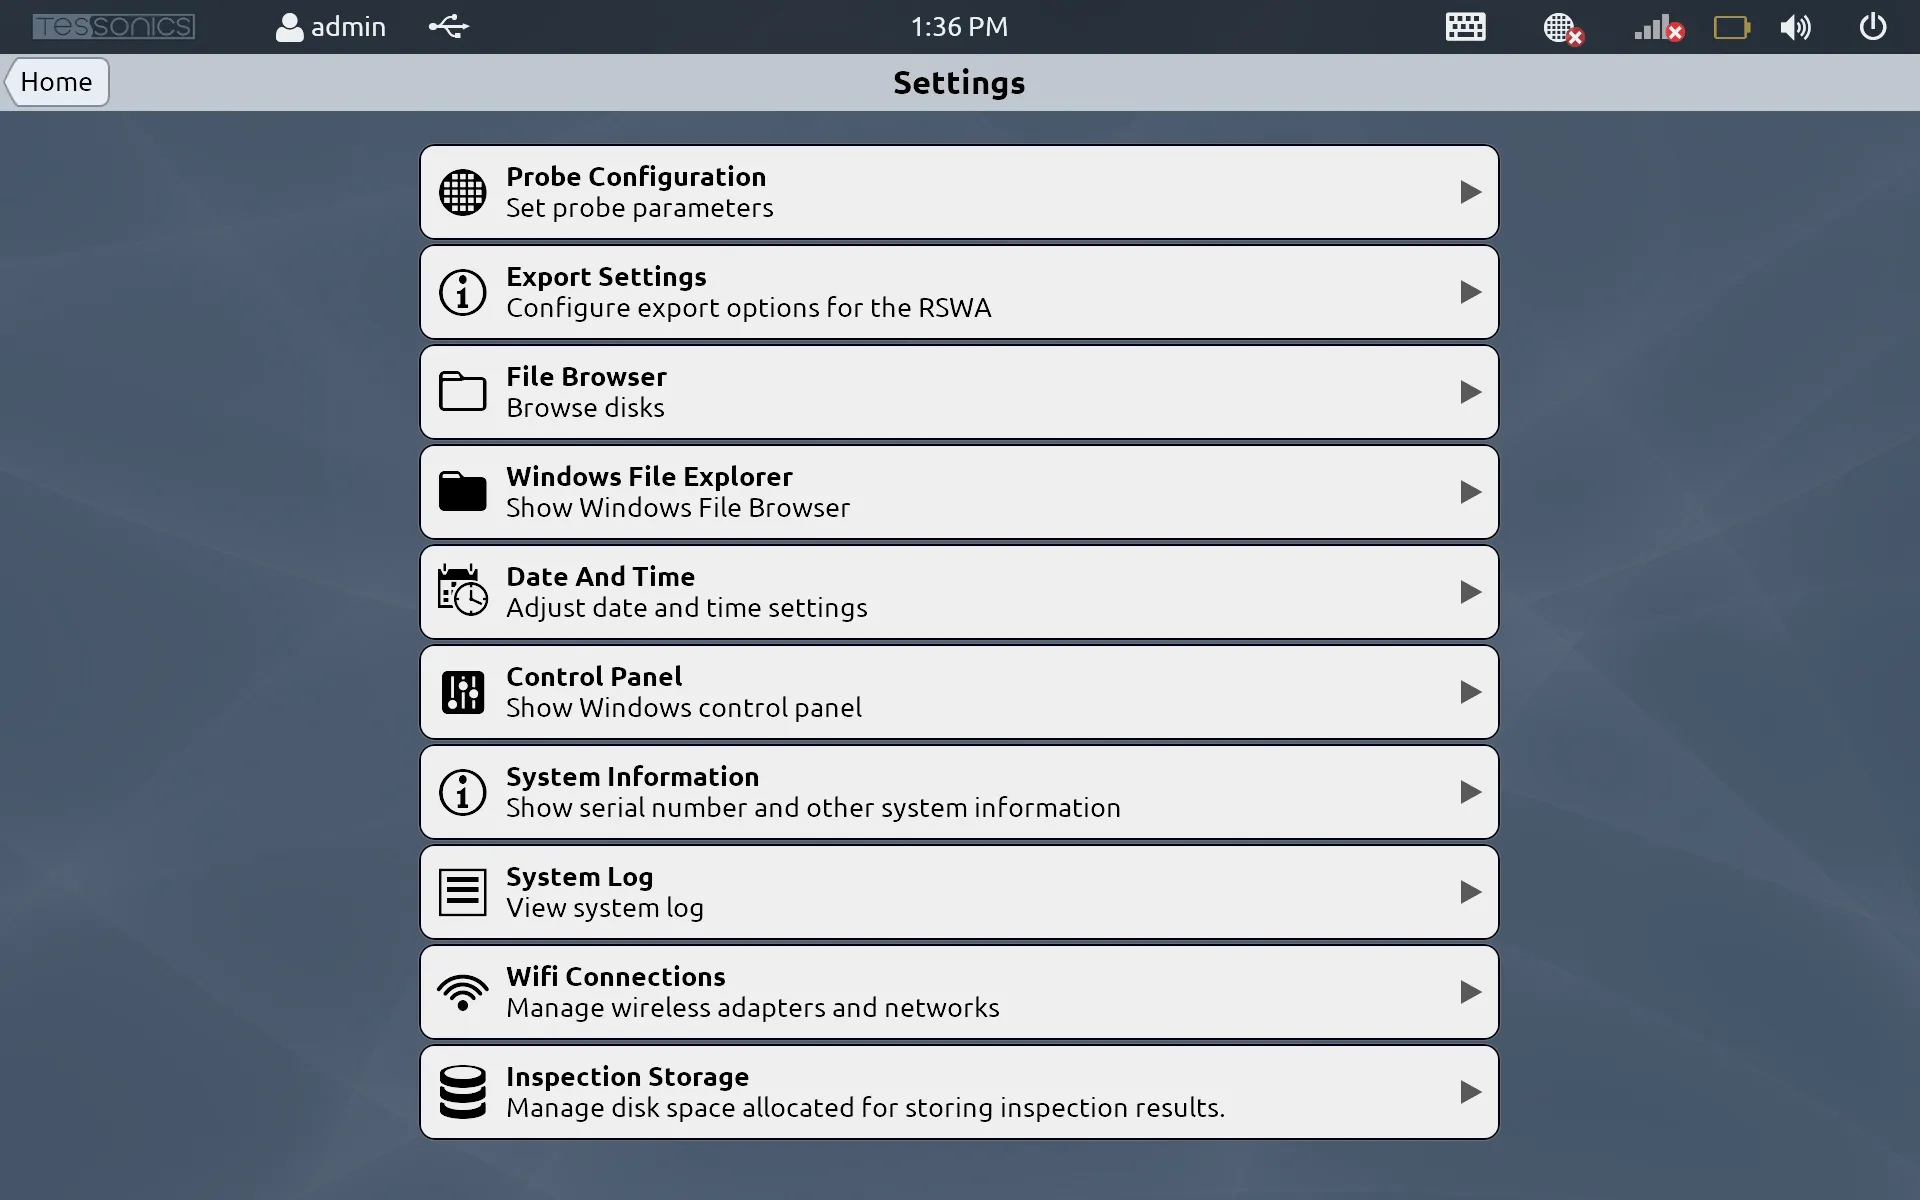
Settings
Array Explorer
Tessonics Corporation has made every effort to ensure the accuracy and completeness of this document; however, because ongoing efforts are made to continually improve the capabilities of our products, we cannot guarantee the accuracy of the contents of this document. We disclaim liability for errors, omissions, or future changes herein.
Tessonics Corporation and its subsidiaries reserve the right to make changes, corrections, enhancements, modifications and improvements to its products and/or to this document at any time without notice.
Information in this document supersedes and replaces information previously supplied in any prior versions of this document.
Tessonics and the Tessonics logo are trademarks of Tessonics Corporation.
All other trademarks mentioned herein are the property of their respective owners.
©2007–2024 Tessonics Corporation. All rights reserved.
No part of this document may be copied, reproduced, or translated, without the prior written consent of Tessonics Corporation.
The Settings application provides access to settings, system information, and more.
 {min-width=45%}
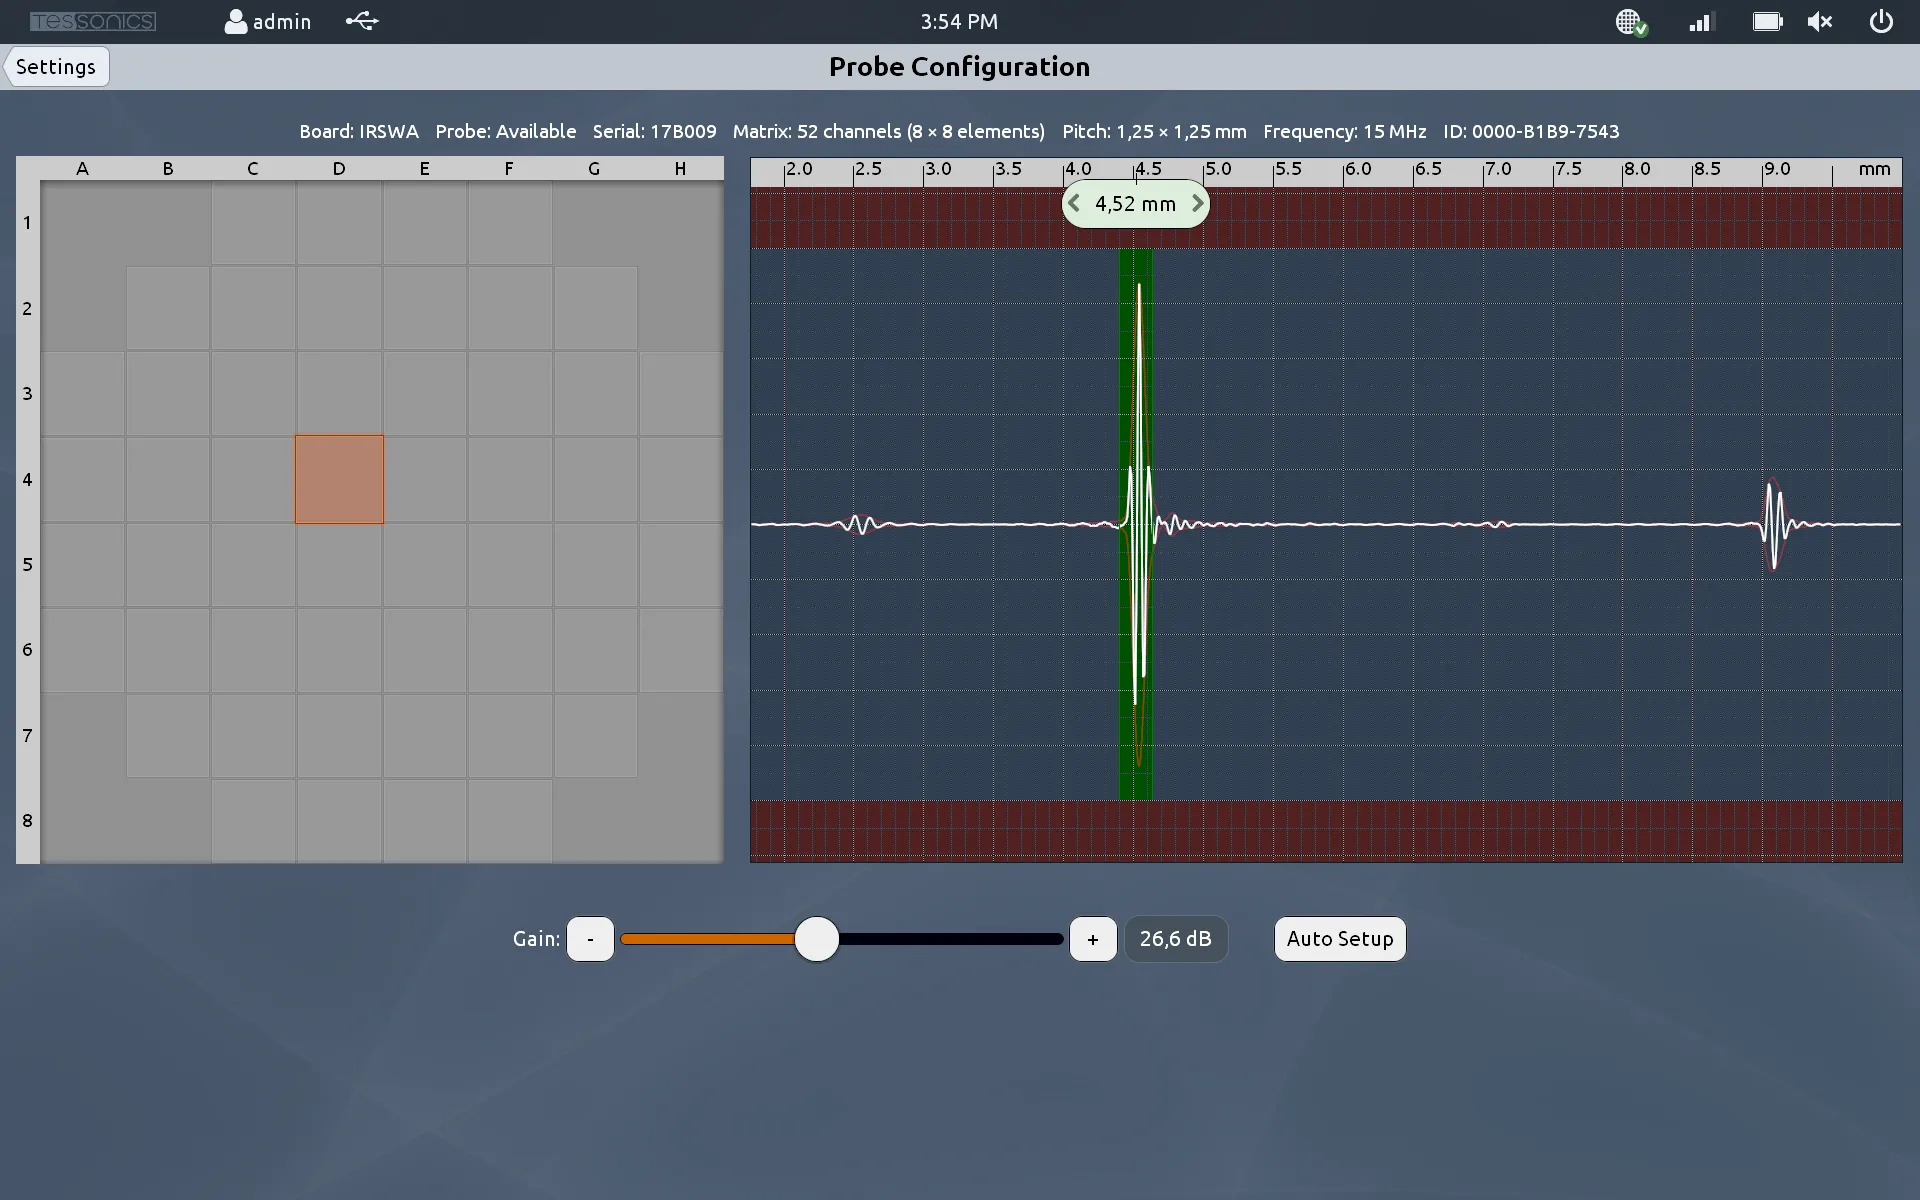
Probe Configuration
Configure your ultrasonic probe. This page allows you to adjust settings related to your ultrasonic probe. In most cases, the Auto Setup action should be sufficient for operating your RSWA.
 {min-width=45%}
Export Settings
This allows you to configure different settings for exporting. The main settings are:
- Export Inspections on Save: After saving an inspection, this setting decides whether or not to automatically export them to the TDS server.
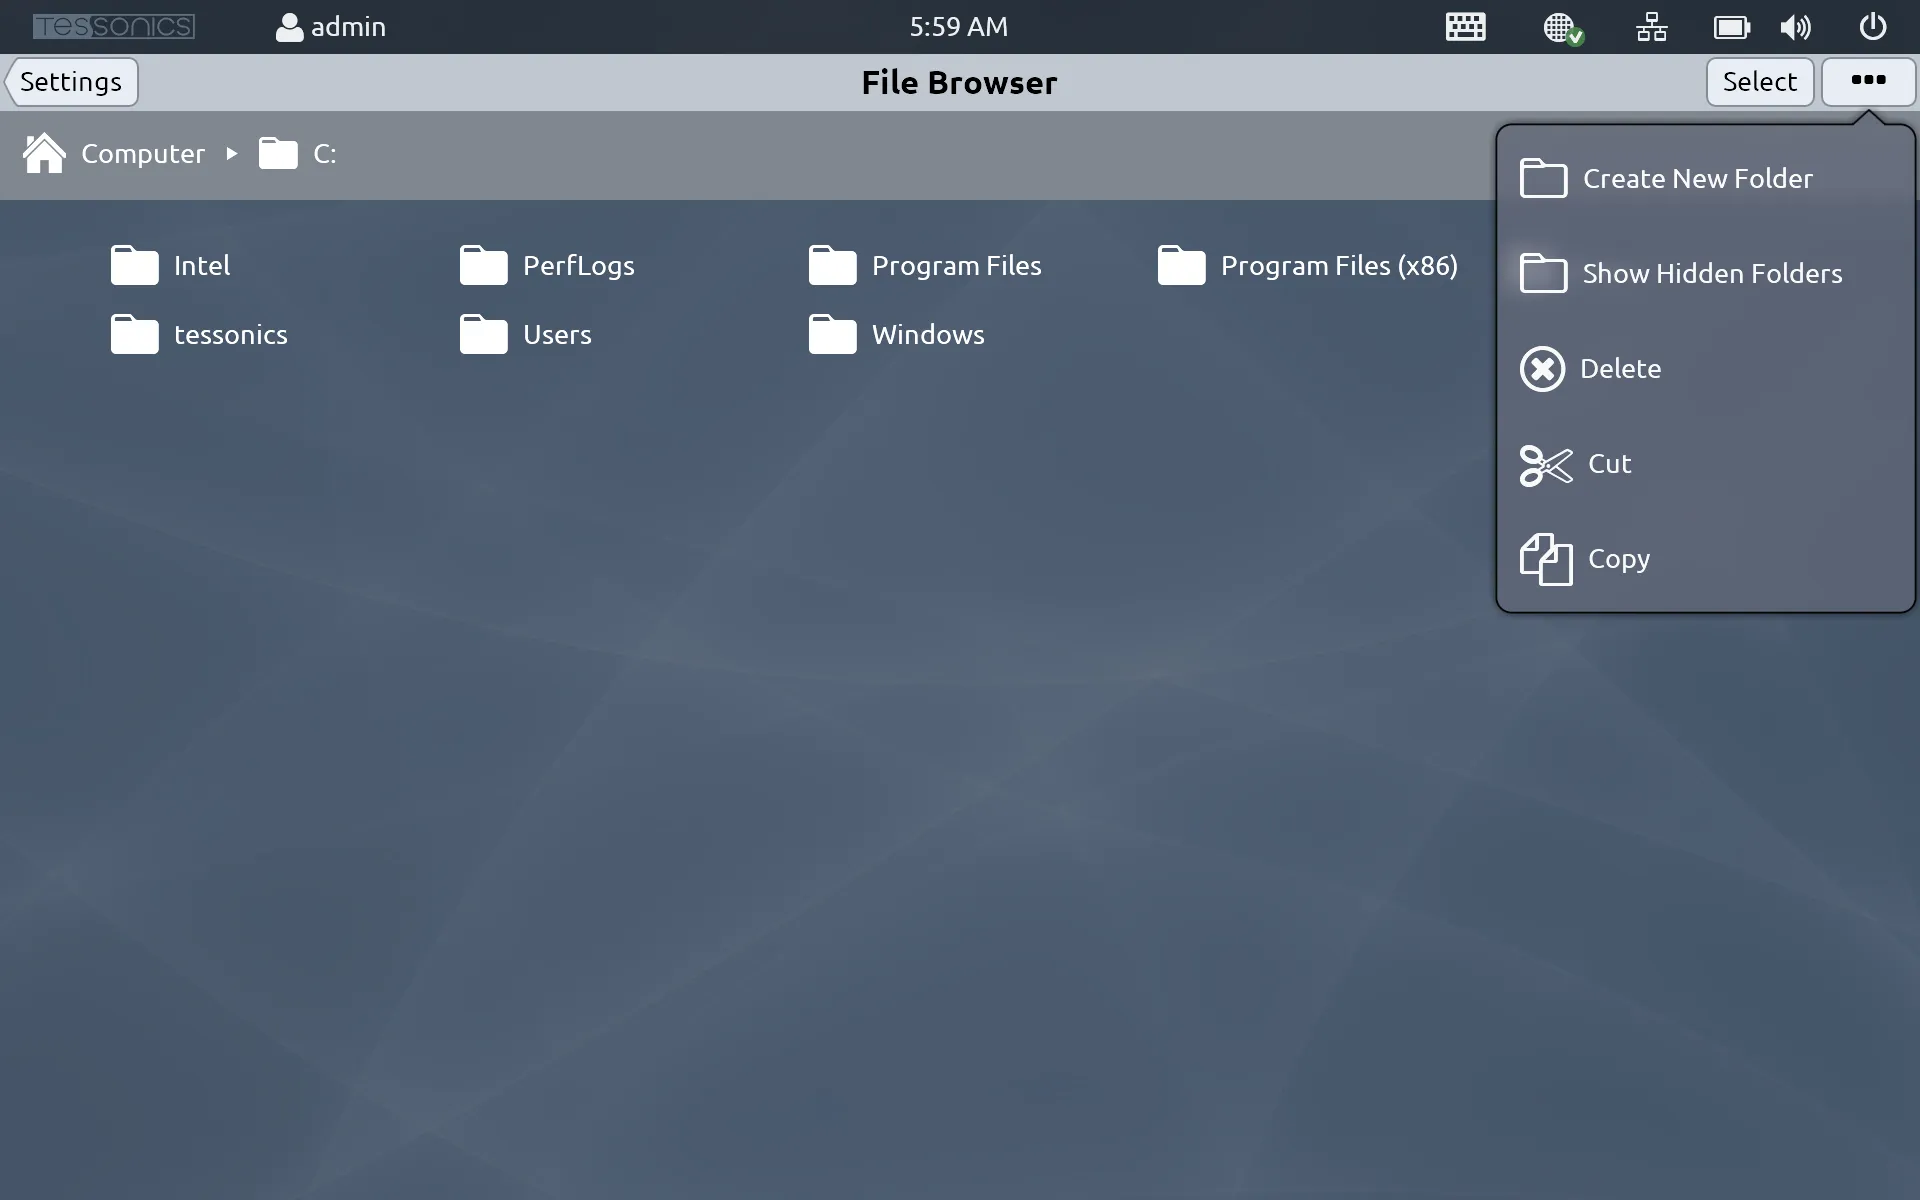
File Browser
Provides access to the file system on the RSWA as if it were a standard PC.
Note
You must be logged in as an admin account to view this setting.You can select different folders and files using the Select button at the top right of the screen, where you have the following options:
- Create New Folder
- Show Hidden Folders
- Delete the selected files and folders
- Cut and Copy the selected files and folders
- Paste
You can also execute .exe files. That is actually how you update the RSWA unit! Simply
download the new executable onto a USB device, navigate to that device using the File Browser,
select the file and hit Execute.
 {min-width=45%}
Windows File Explorer
This will open up the Windows File Explorer. This is useful for more specific features such as taking screenshots and saving to the device.
- As an example use case: take a screenshot of the RSWA by plugging in a standard keyboard and hitting
PrtSc. Then go to the Windows File Explorer, create a new bitmap file (same as you would on Windows) then open it. Then paste the screenshot there and save it as an image file.
After this, you can save the image to a flash drive in the File Explorer.
Note
You must be logged in as an admin account to view this setting.Date and Time
This is where you can set the date, time and timezone.
Note
You must be logged in as an admin account to view this setting.Caution
For all of these settings, you must click Apply in order for the changes to come in effect. If you click the Date And Time arrow at the top left, it will go back without saving.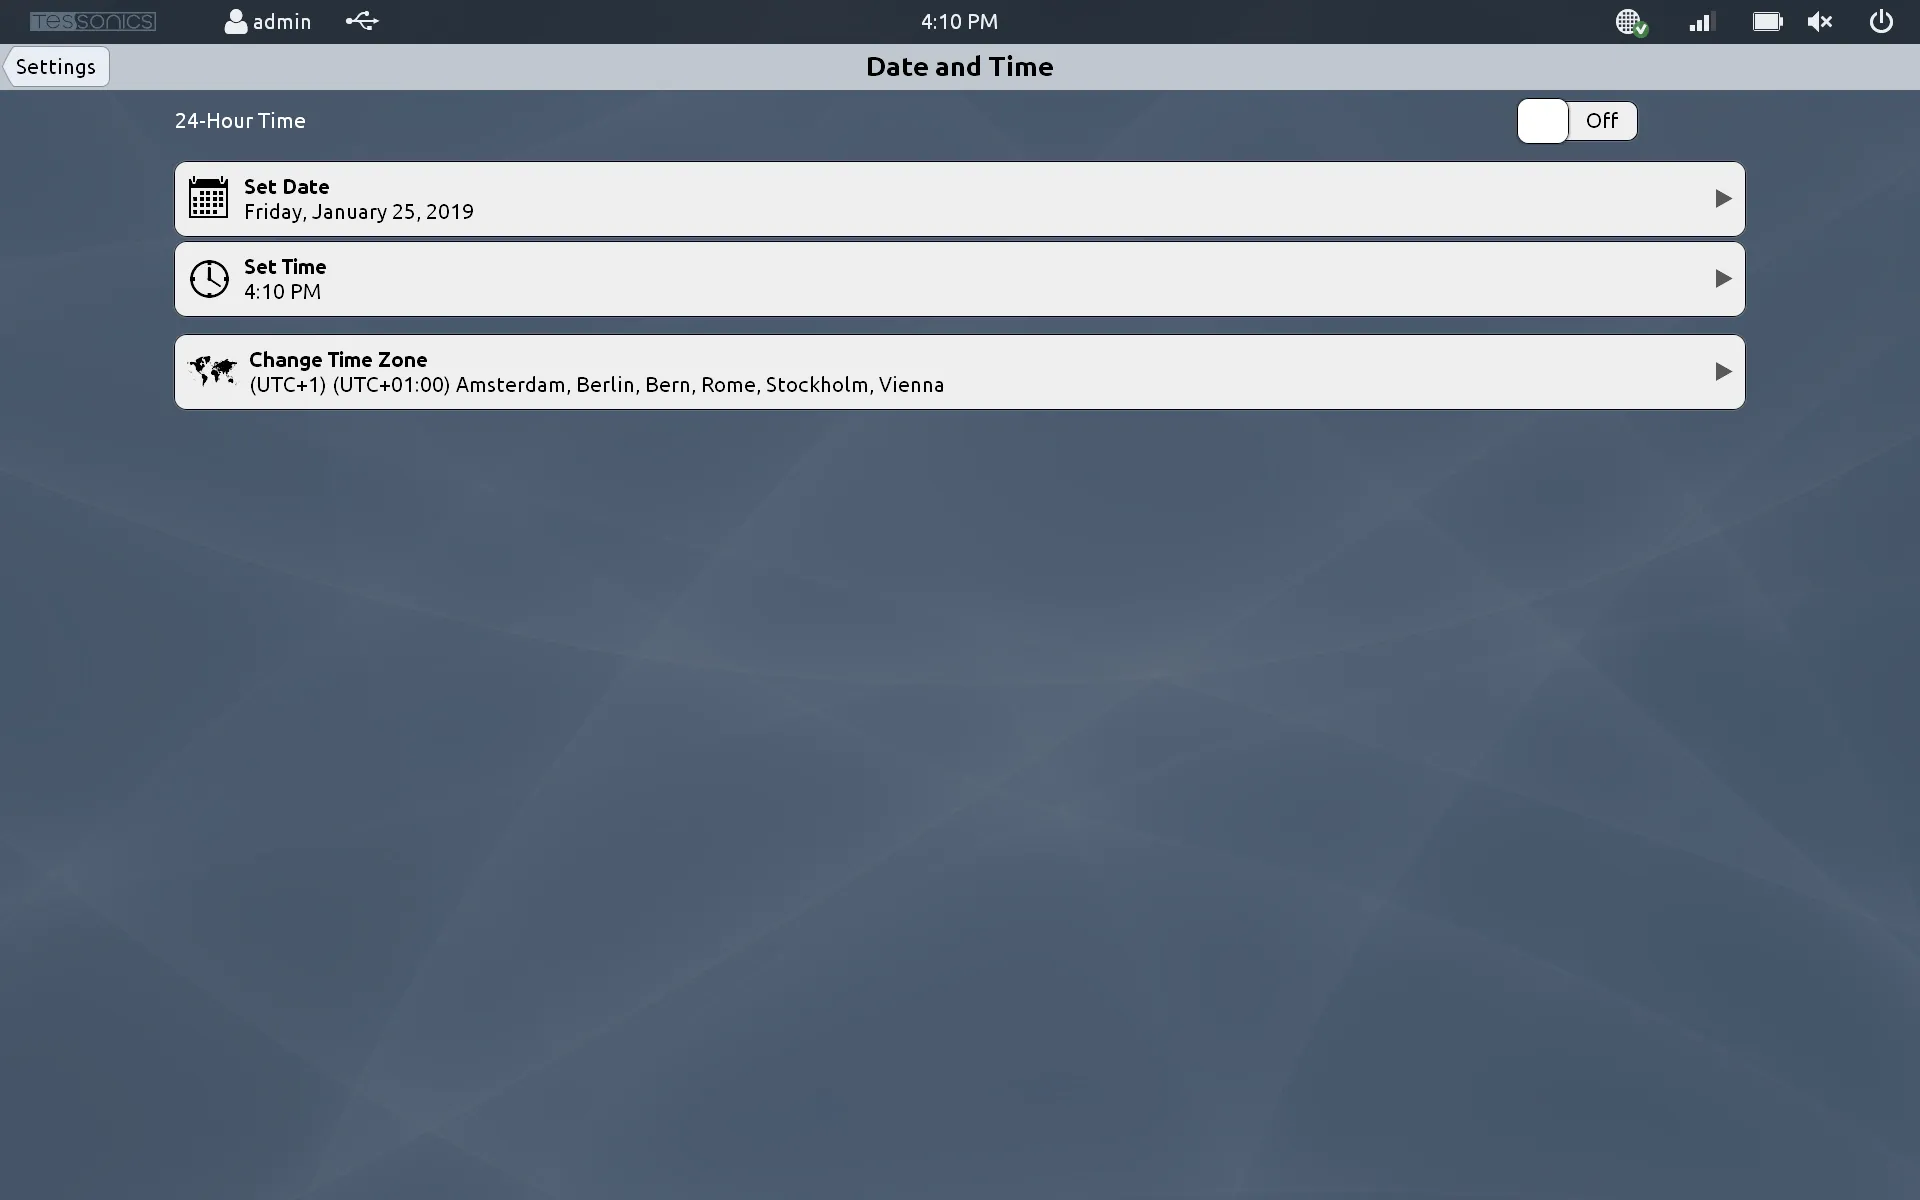 {min-width=45%}
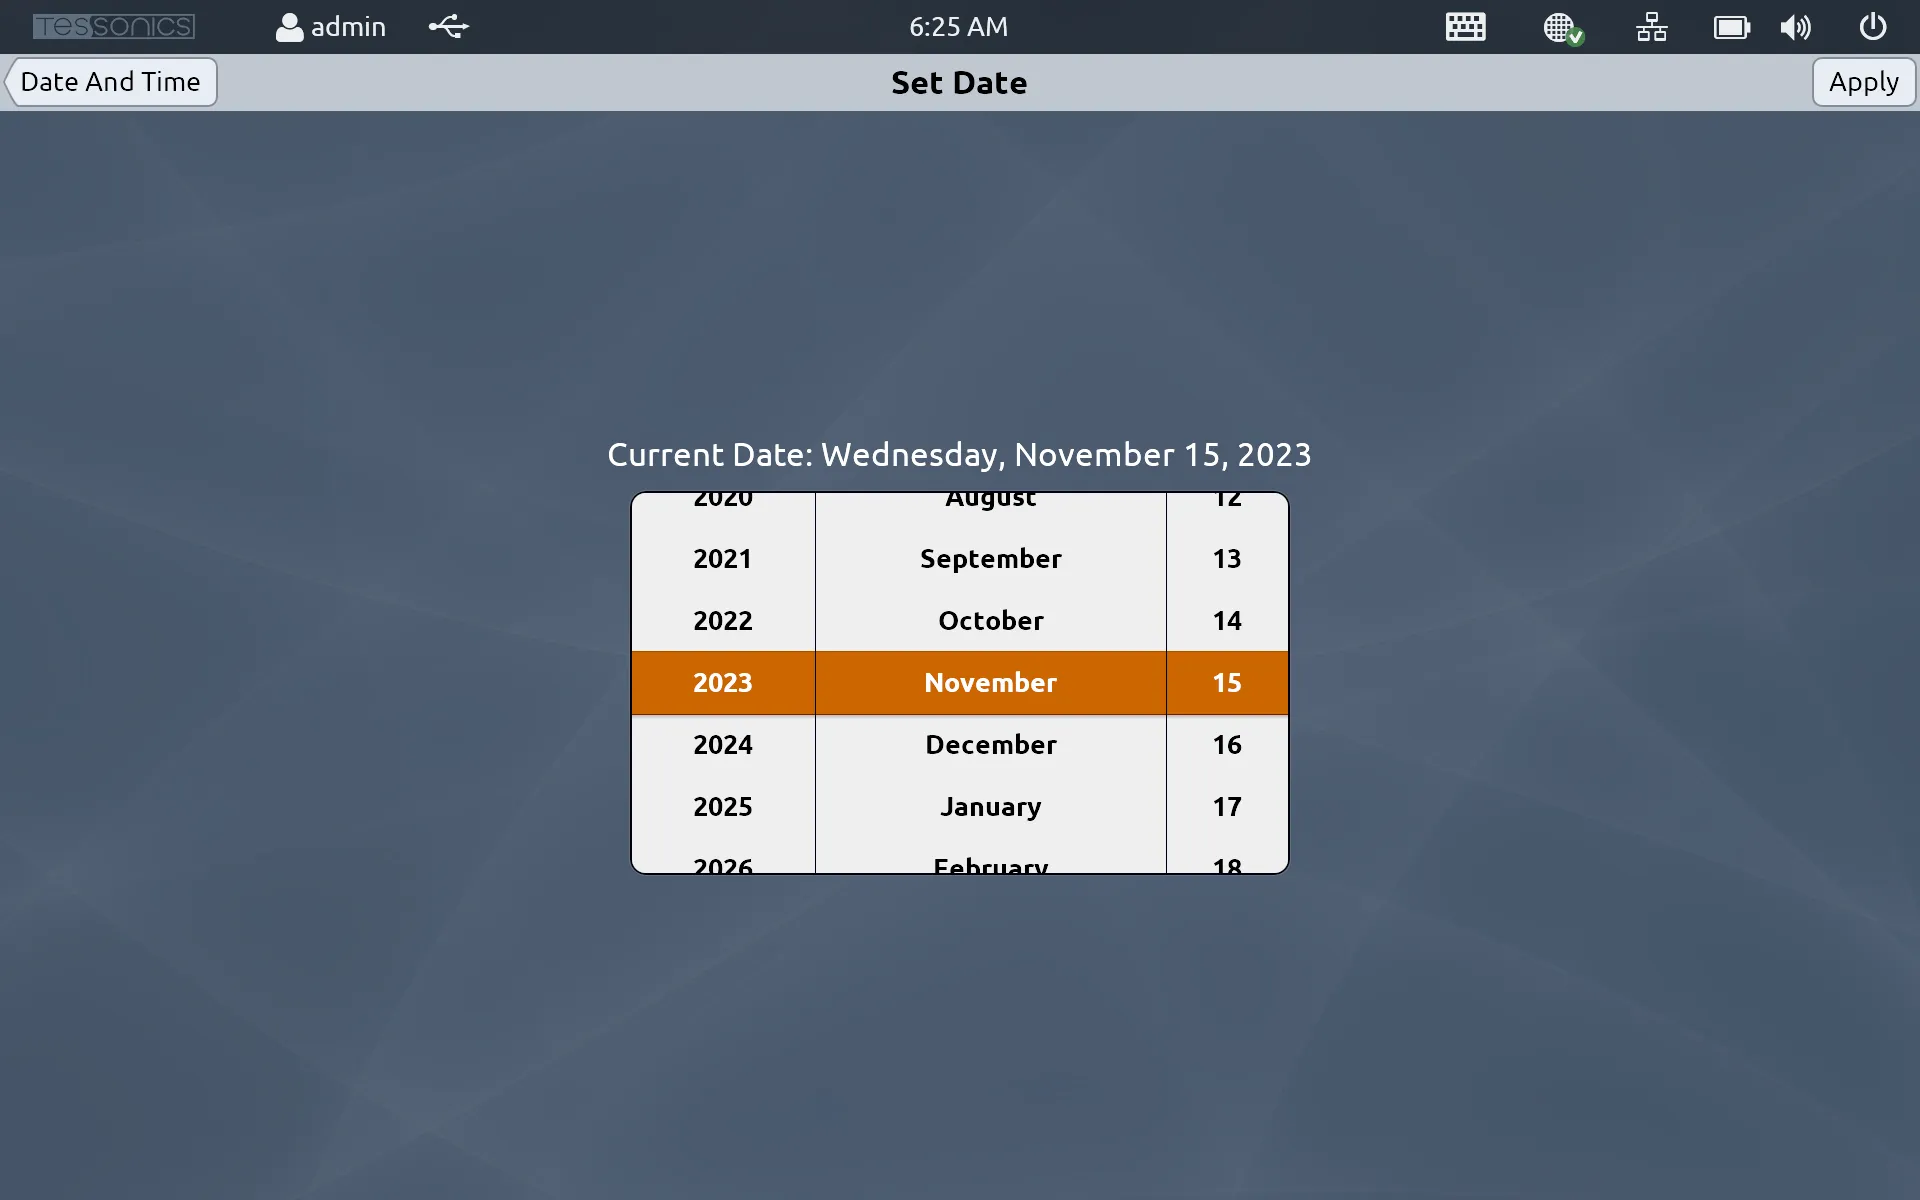
Set Date
Under the Set Date menu, you can scroll through available days of the week, month and year like a standard calendar. Click and drag with a mouse, or touch and drag with a stylus pen or your finger to scroll through the available options. When you’re done, click Apply at the top right of the screen.
Set Time
Under the Set Time menu, you can go through a similar process as setting the date to set the exact time. You also have an option to change to a 24-hour system. Click Apply when done to save your changes.

Set Timezone
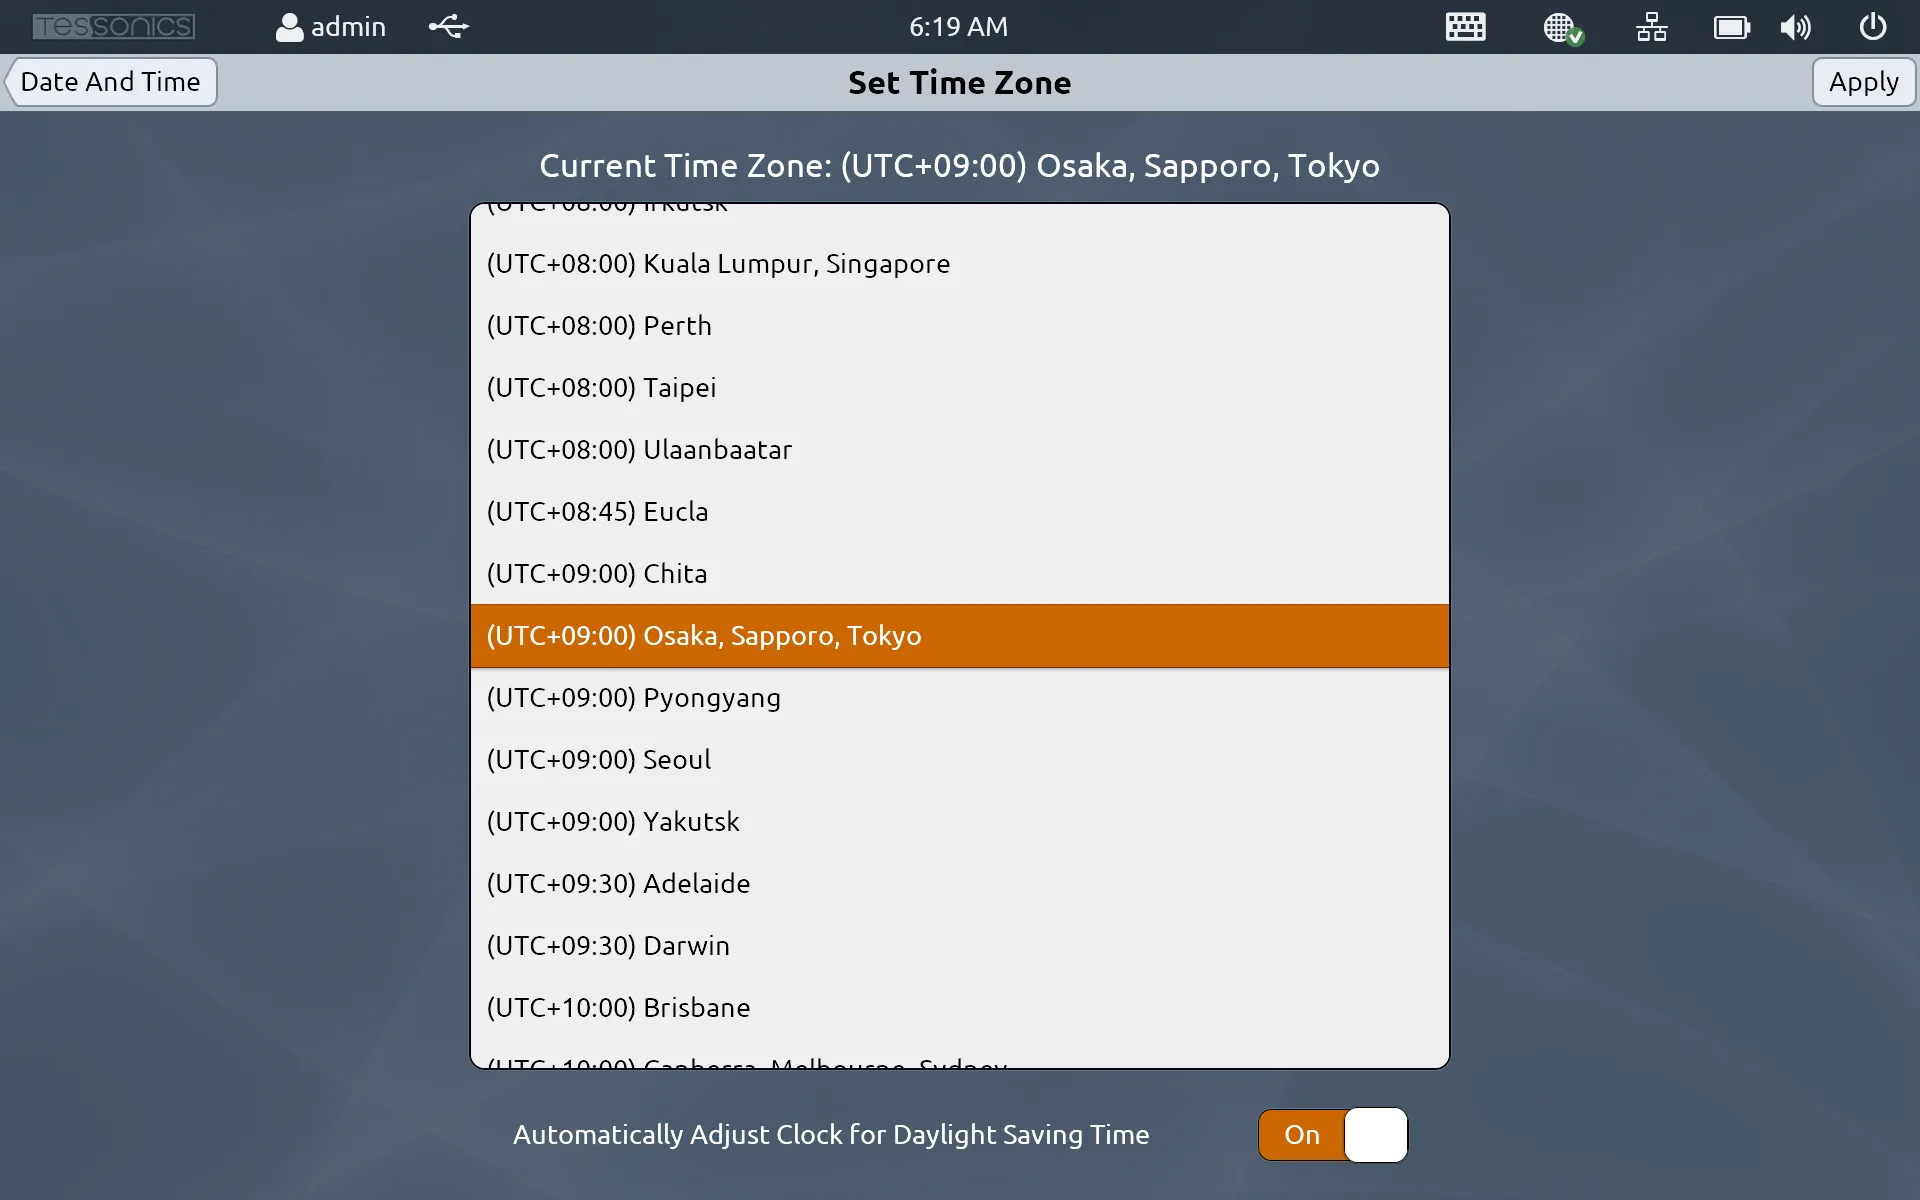
Under the Set Timezone menu, you can go through a similar process as setting the date and timezone. You also have an option to adjust to Daylight Saving Time or not. Click Apply when done to save your changes.
Control Panel
Provides access to the Windows Control Panel. There you can make additional modifications such as enabling remote desktop support, same as you would on any Windows 10 computer.
Note
You must be logged in as an admin or advanced account to view this setting.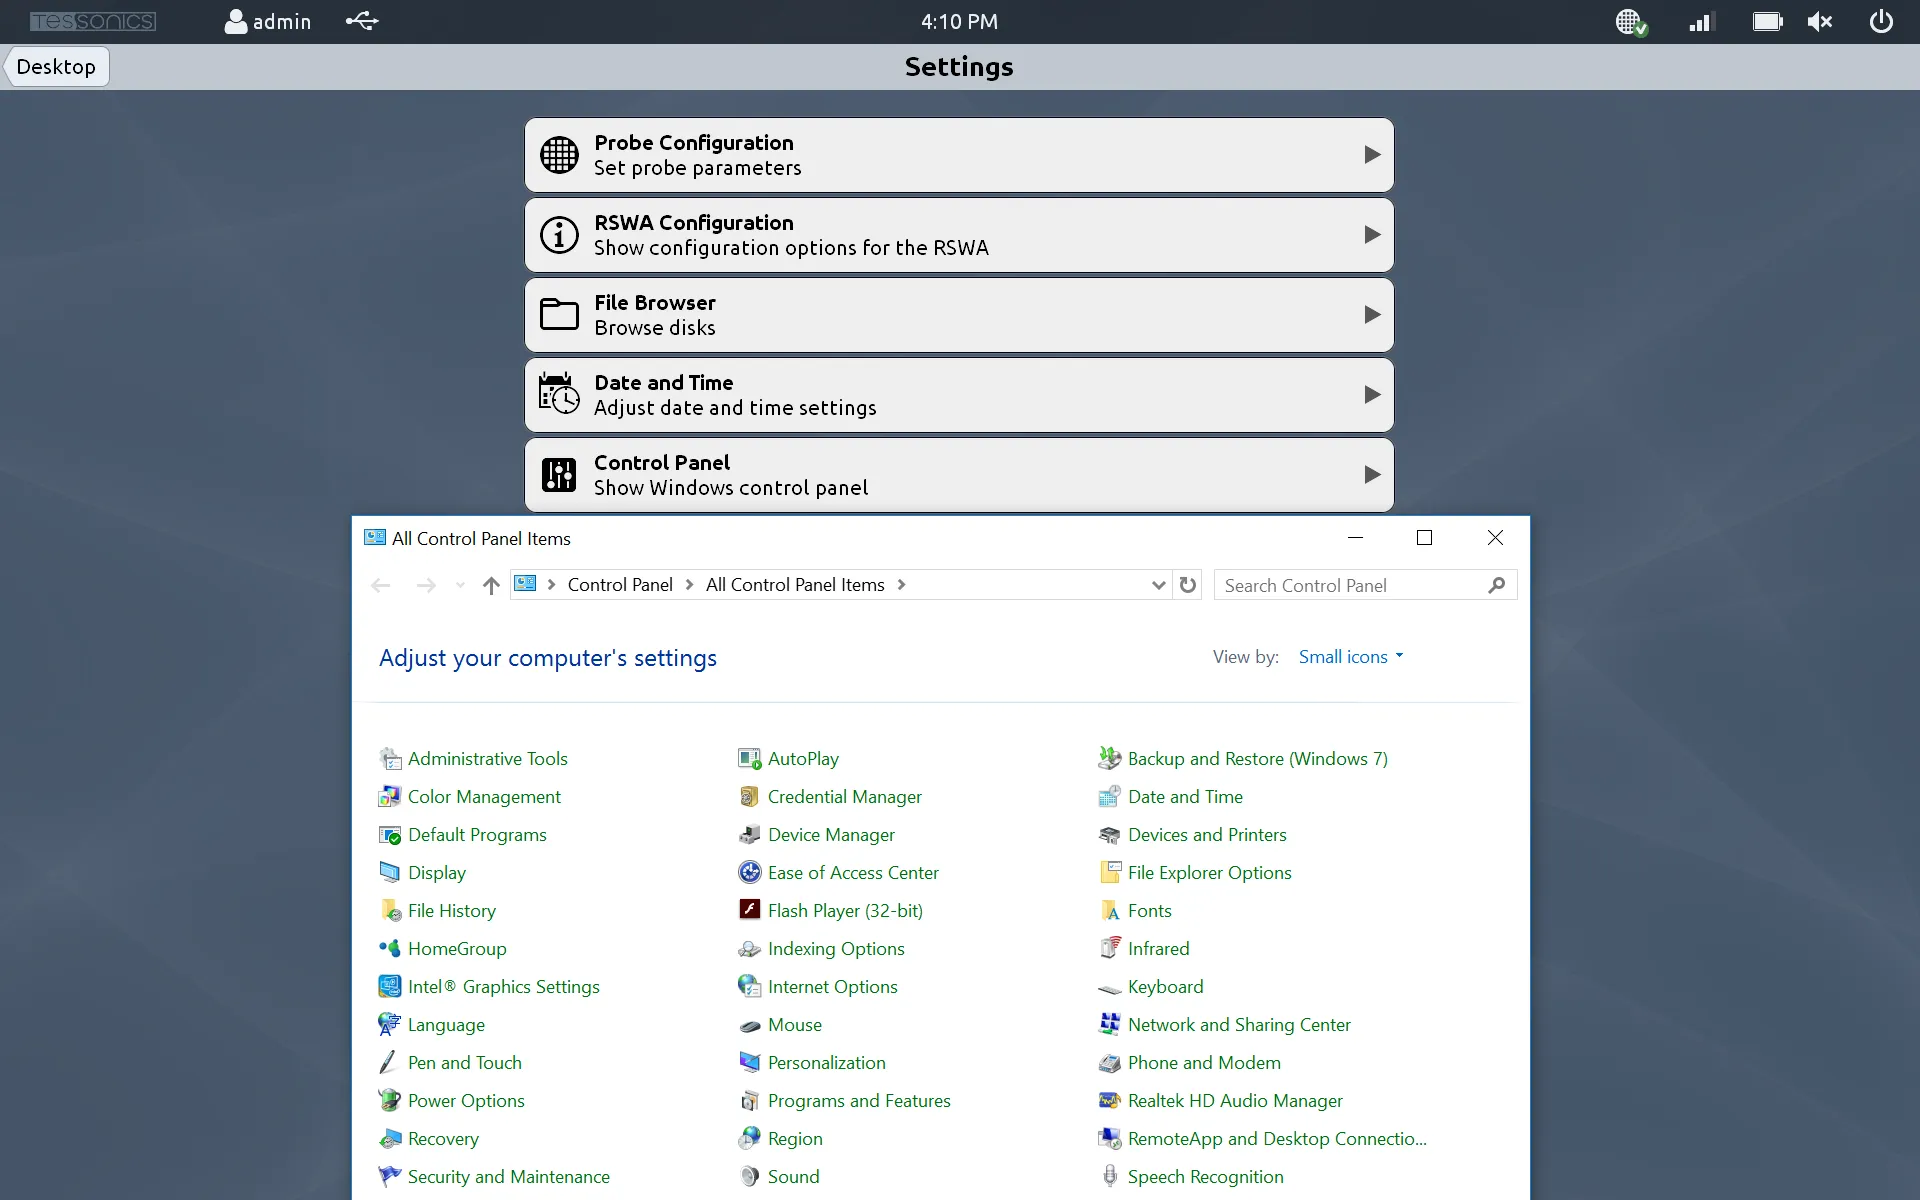 {min-width=45%}
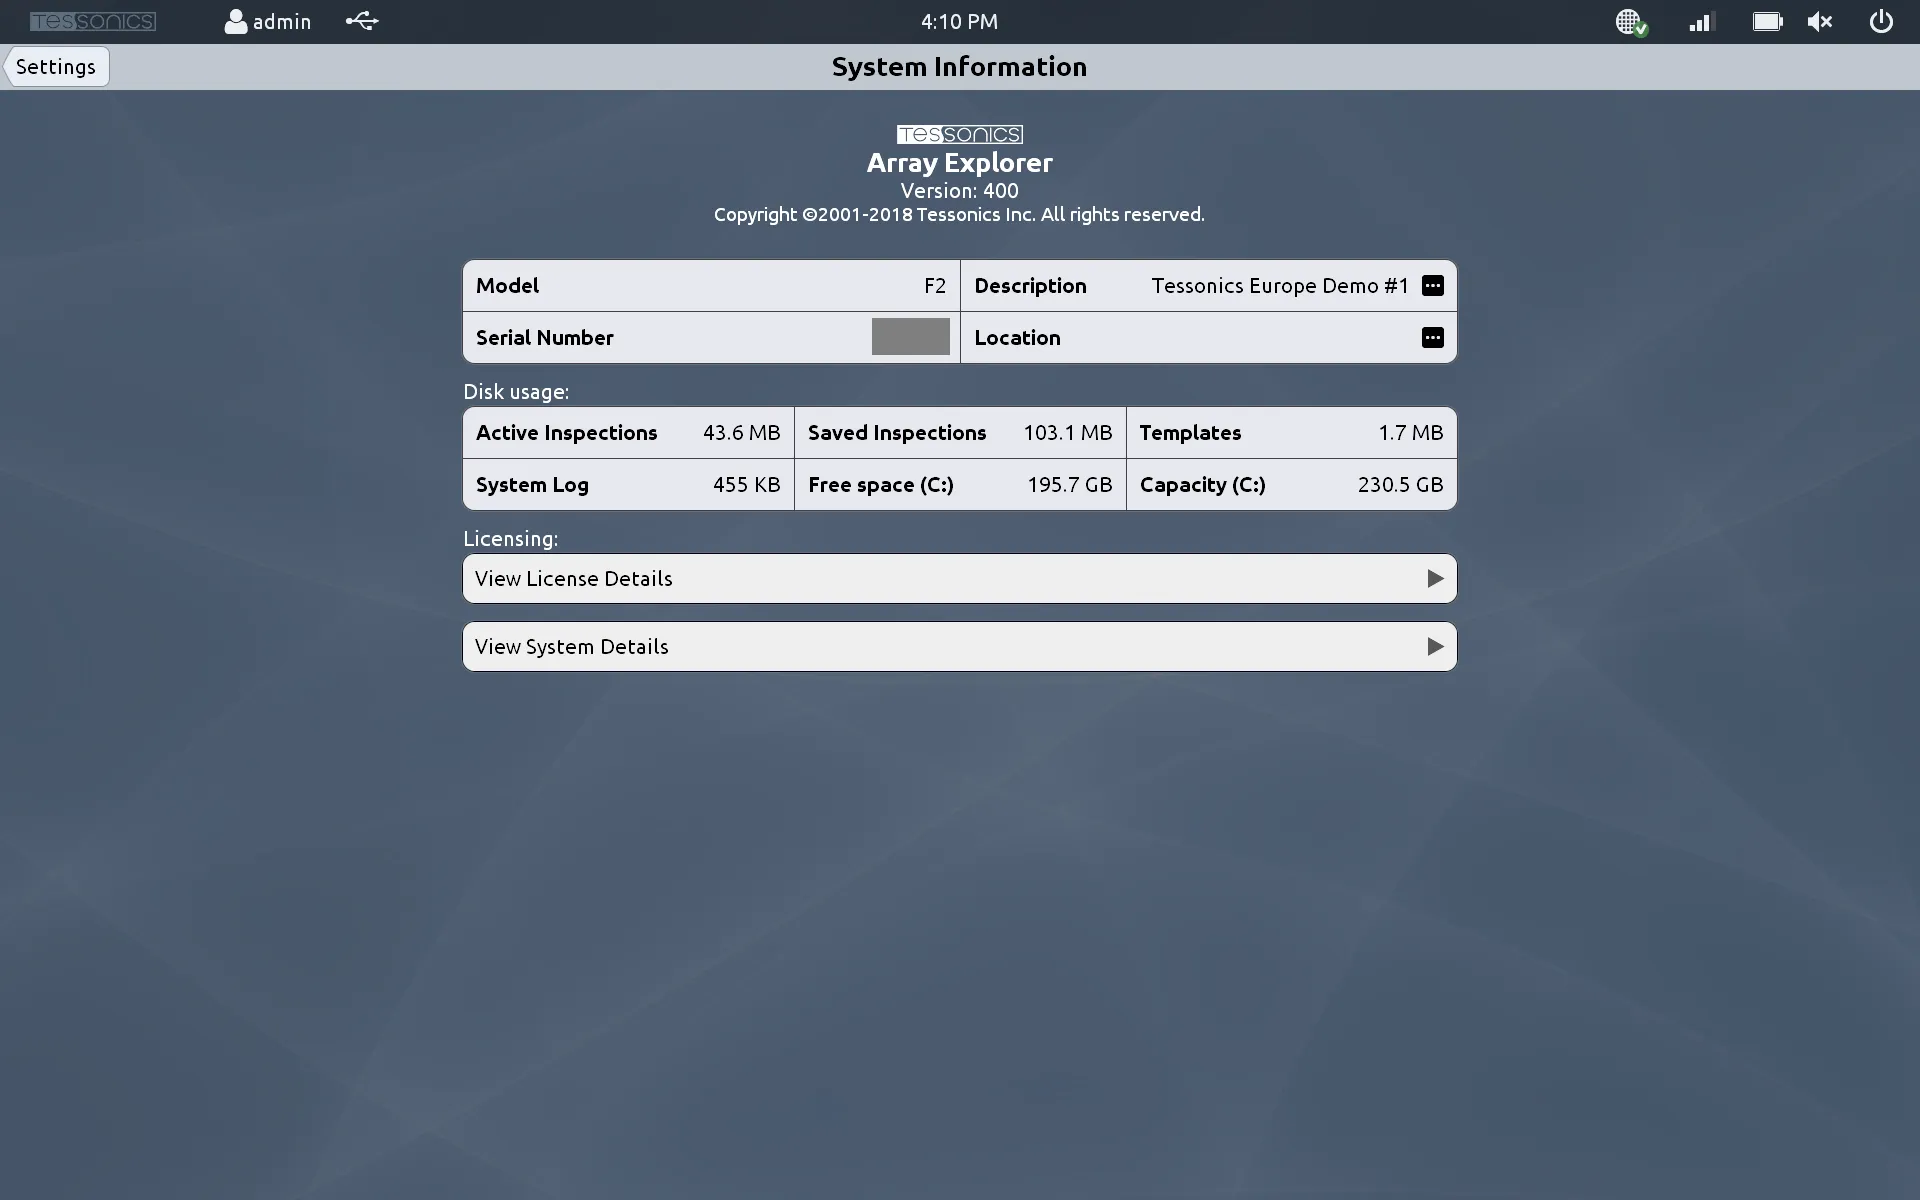
System Information
Show information related to your RSWA, including the software version, licensing information, and hardware information.
 {min-width=45%}
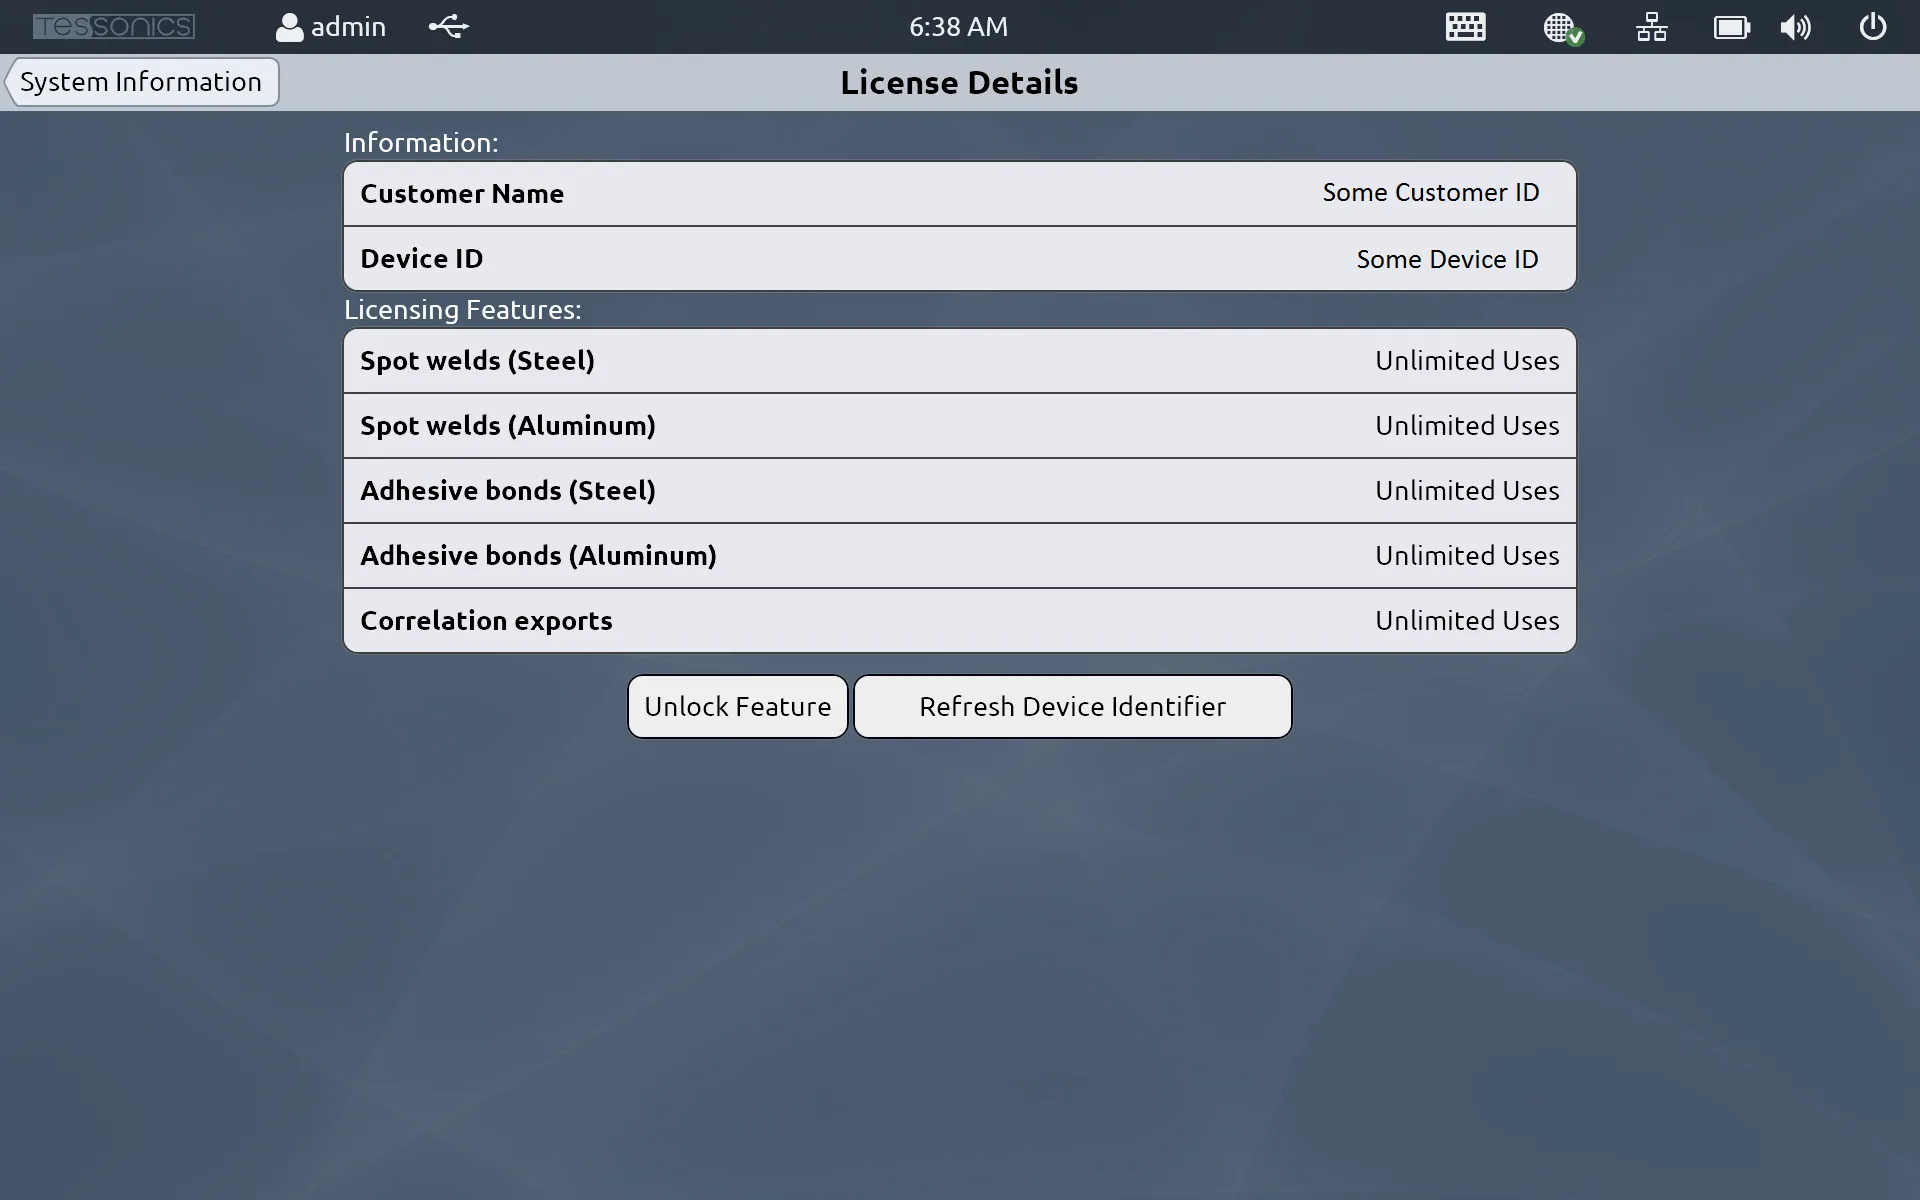
License Details
License details includes the customer name registered on the device, the device’s ID and the amount of spot welds (steel and aluminum), adhesive bonds (steel and aluminum) and correlation exports the device is registered to accomplish.
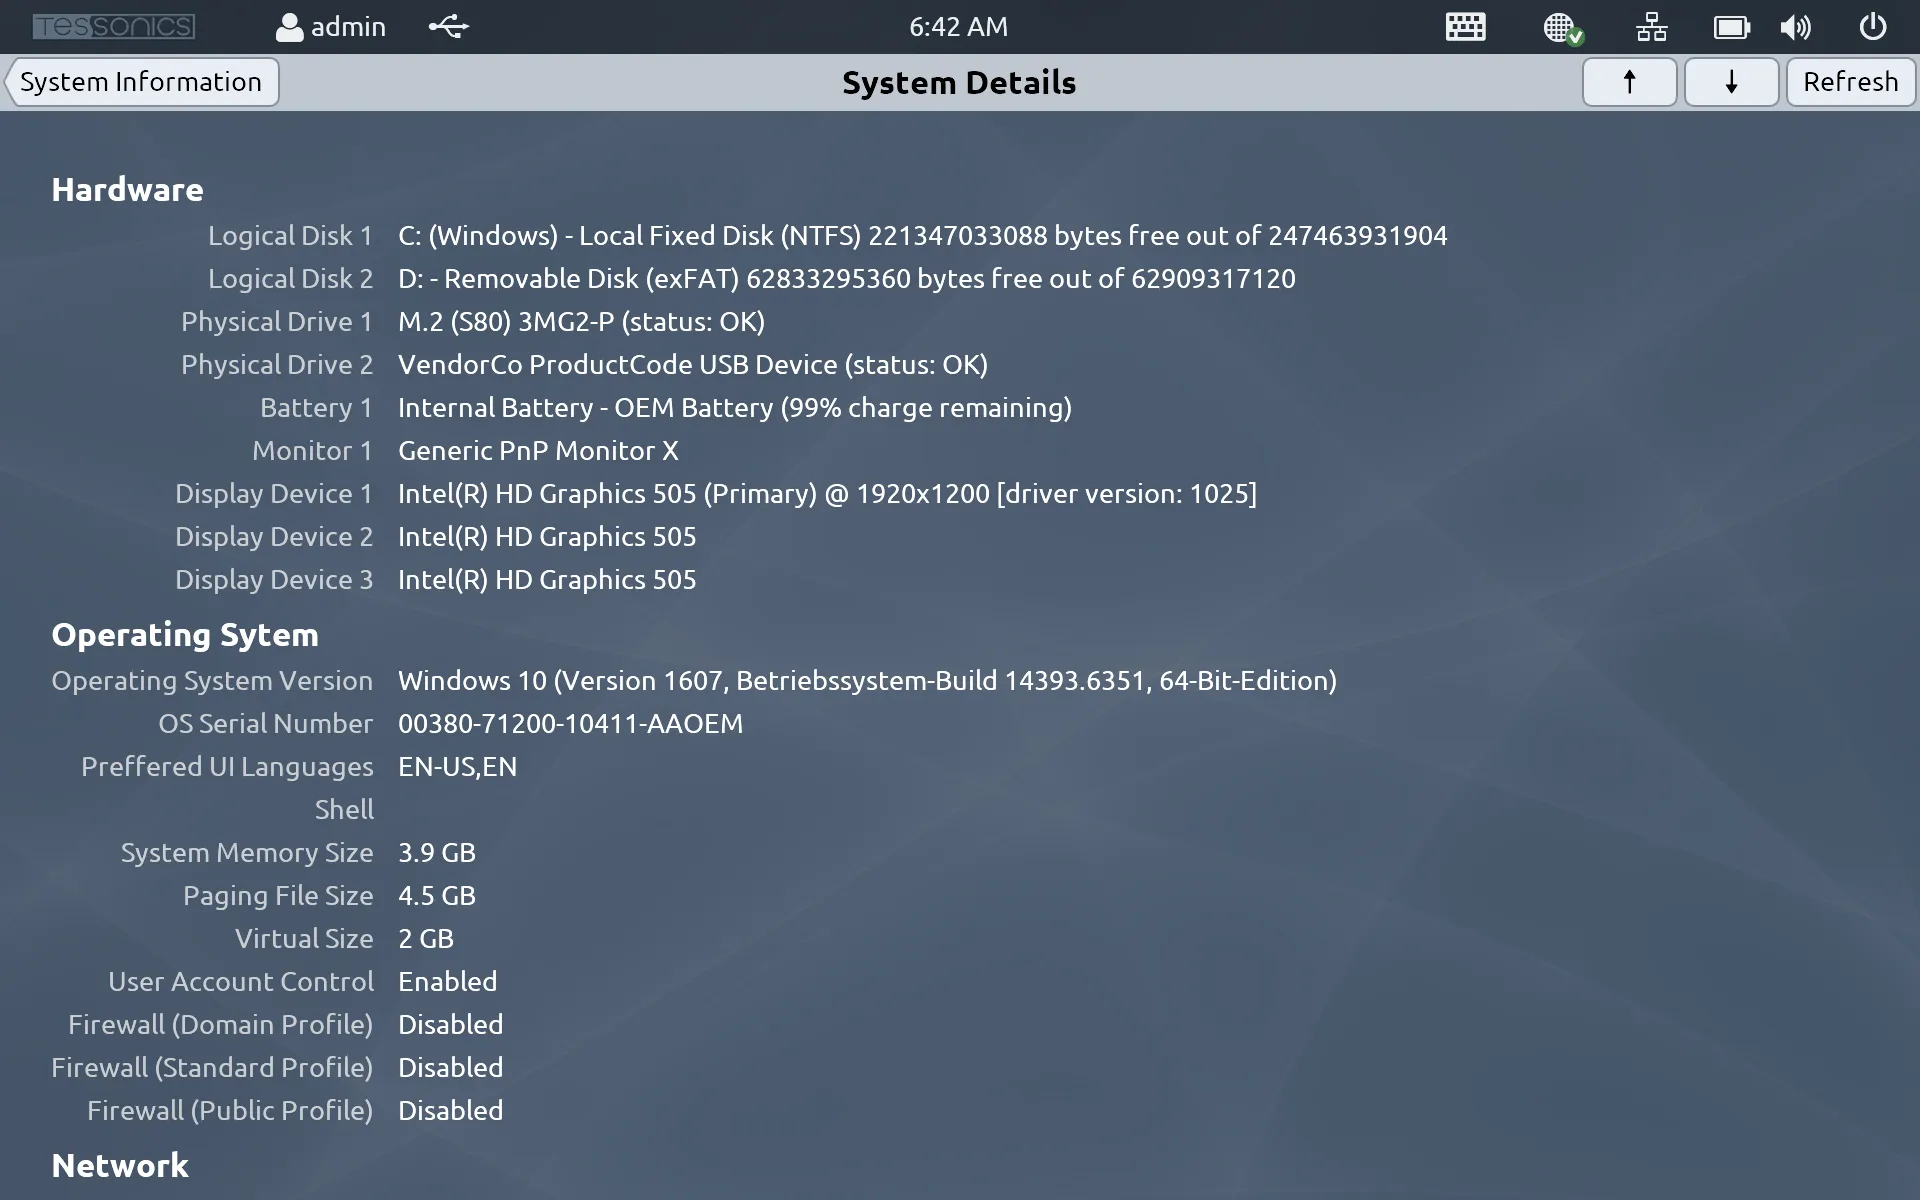
System Details
System details include information about the hardware and software currently running on the system, including the hardware, operating system, network, software versions and system paths.
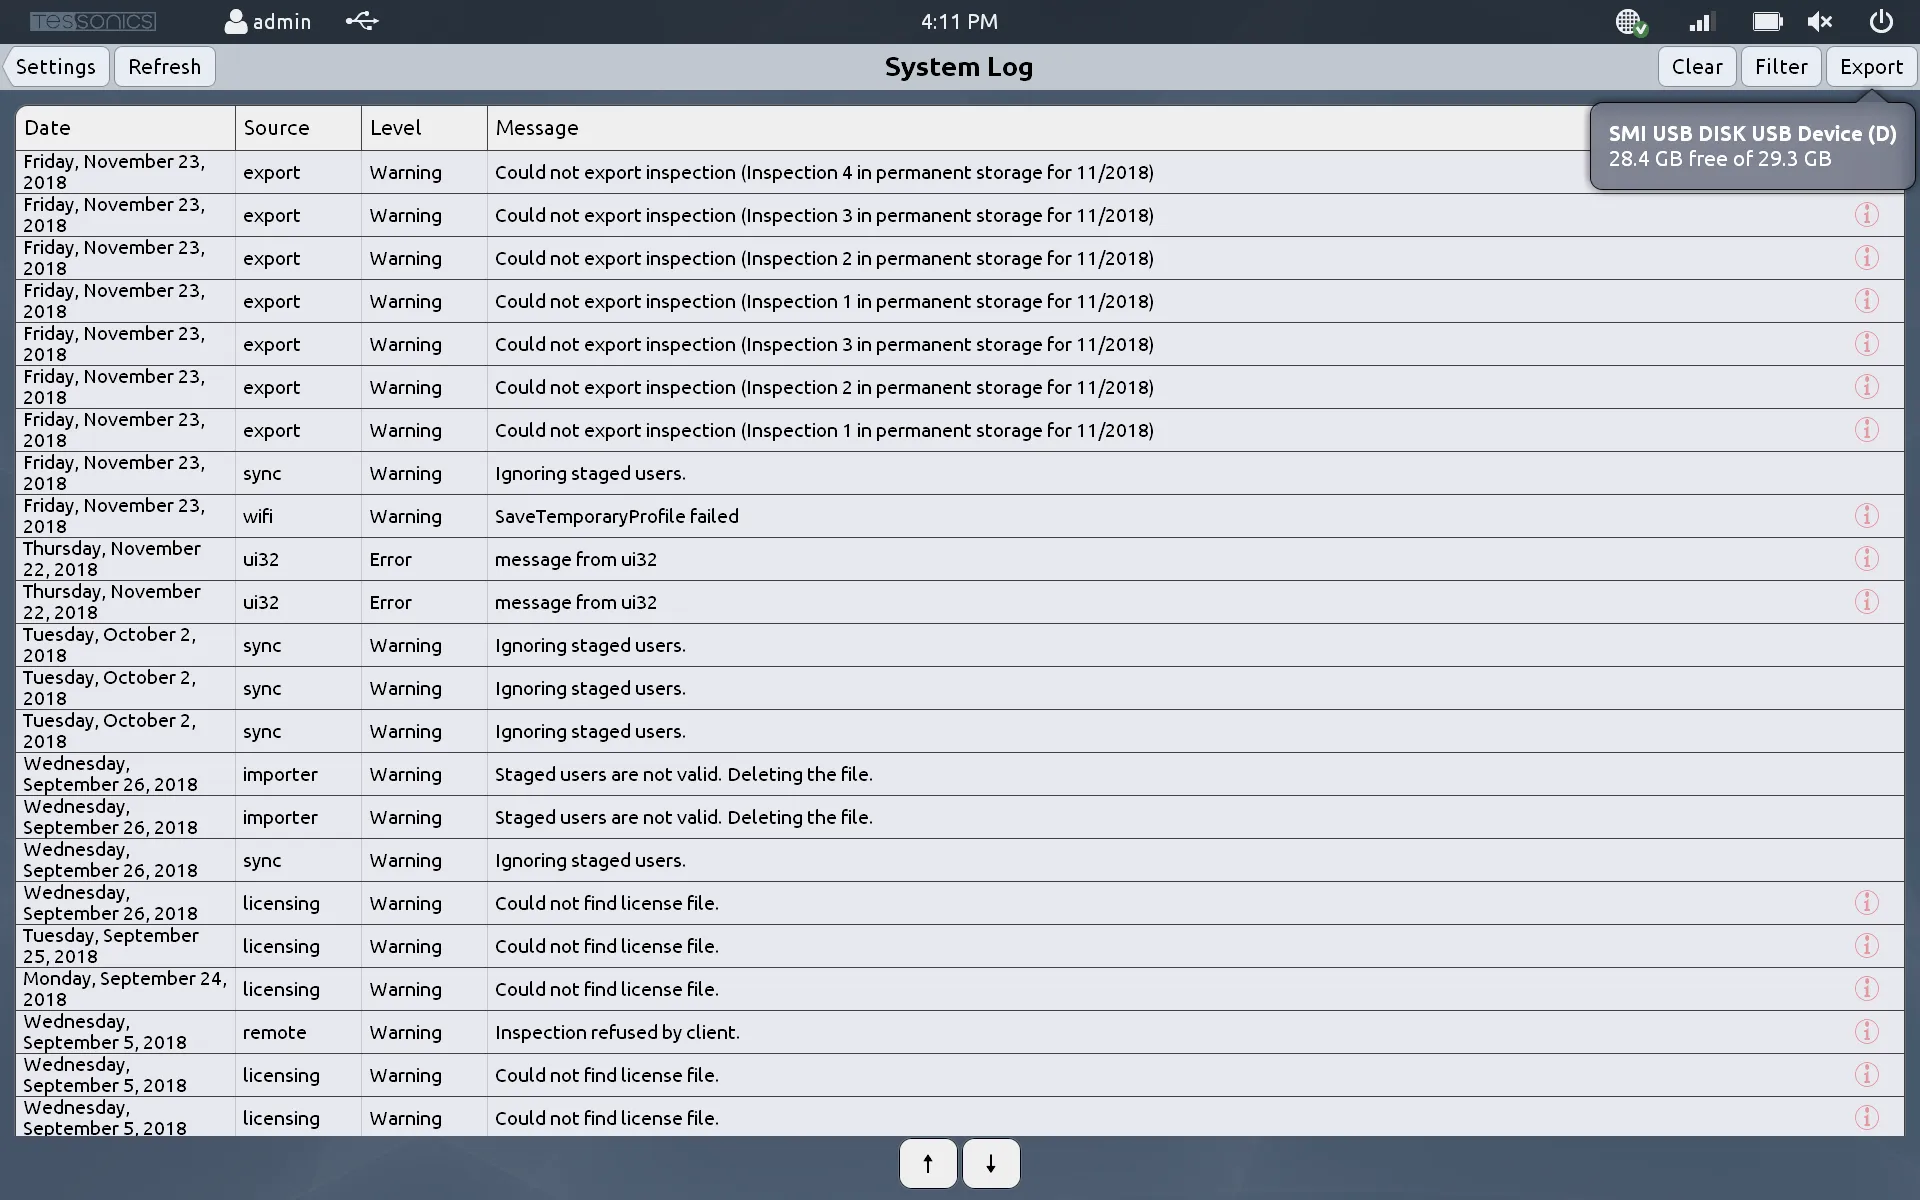
System Log
Provides access to the RSWA activity log, including the performing of inspections, licensing updates, importing and exporting data, and other general system errors and warnings.
You have options to clear the logs, filter them by labels and to export them to a USB drive.
 {min-width=45%}
Wifi
Wifi Connections
Adjust wifi settings so that the RSWA can transfer data wirelessly. This is where you can connect, disconnect and forget about different networks. Clicking on Edit also allows you to order the priority of different networks by moving certain networks up or down the list.
Note
You must be logged in as an admin or advanced account to view this setting.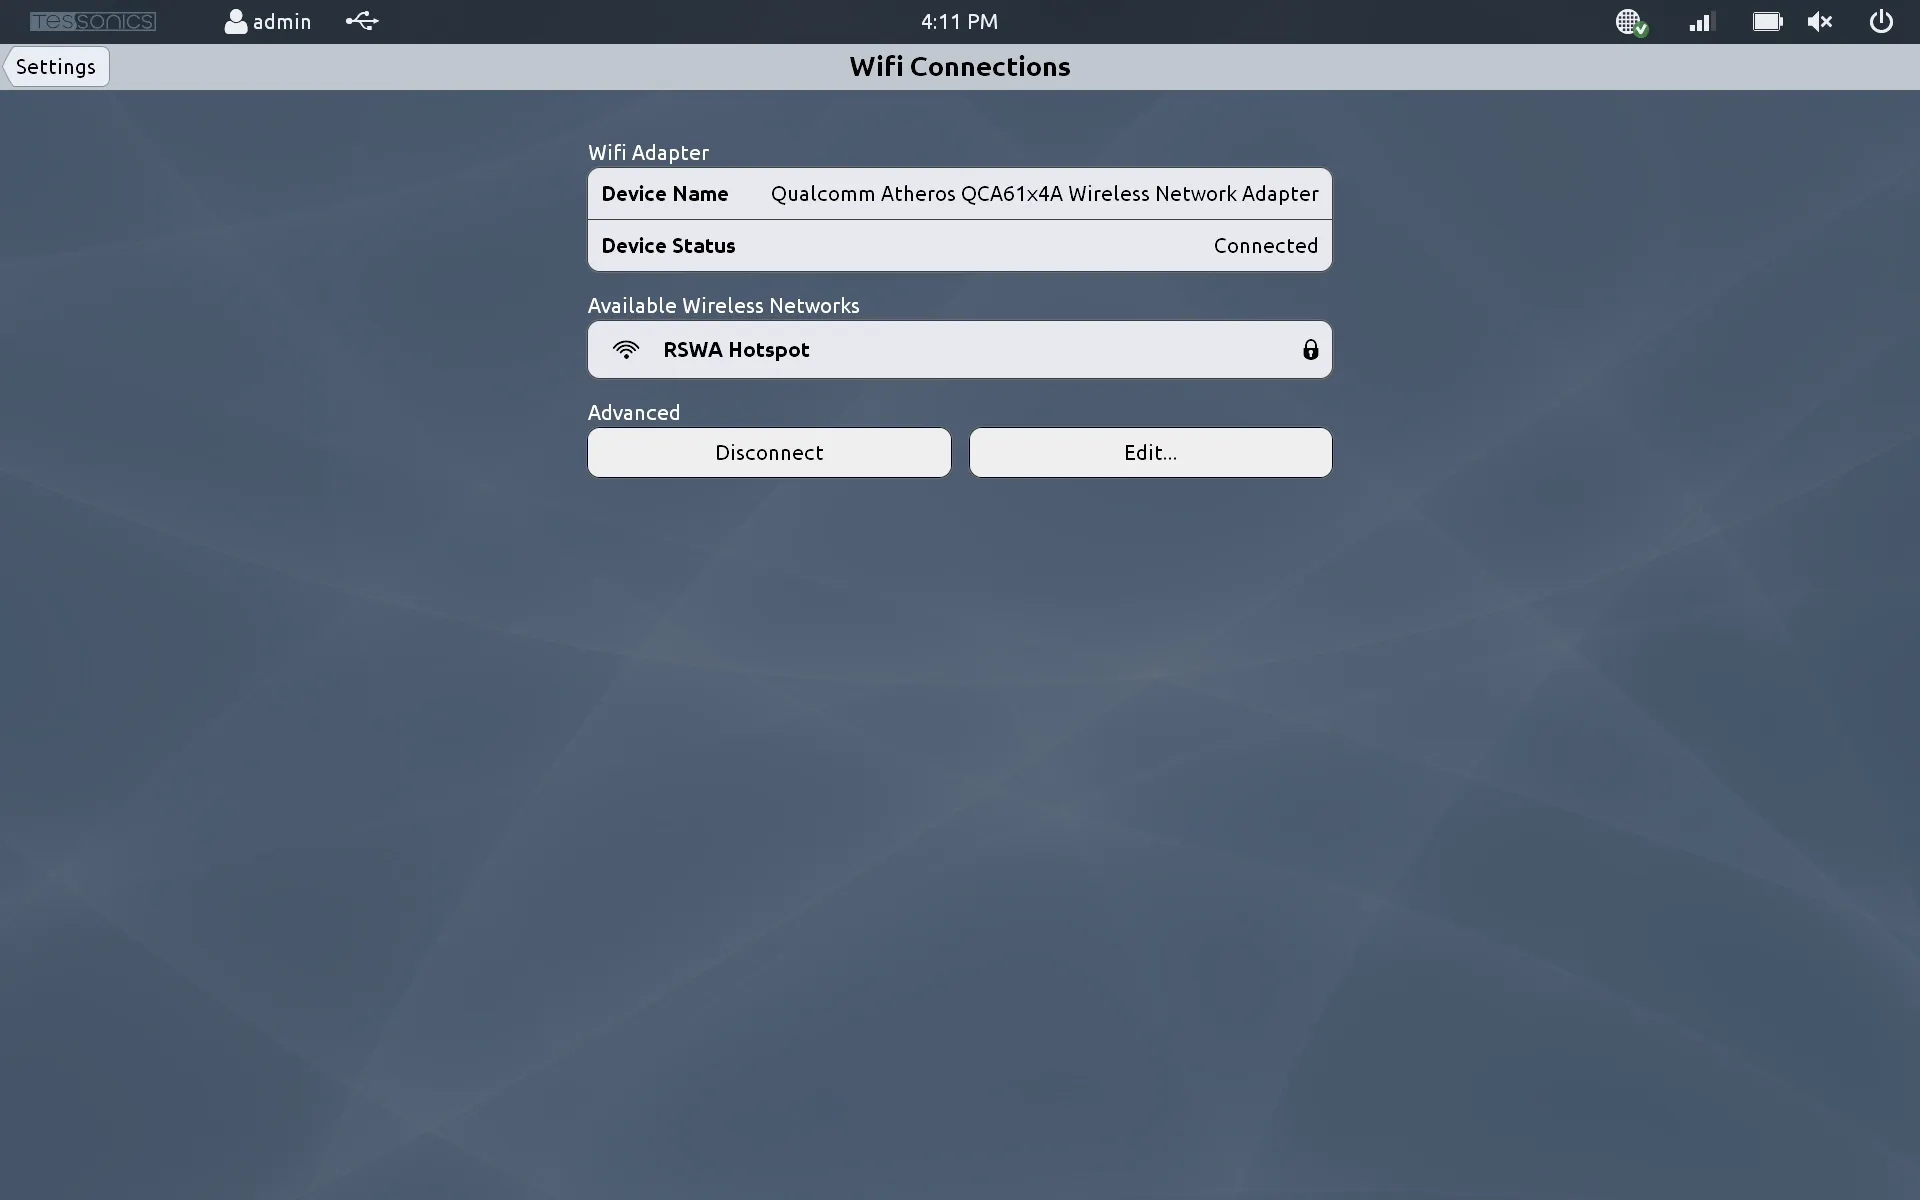 {min-width=45%}
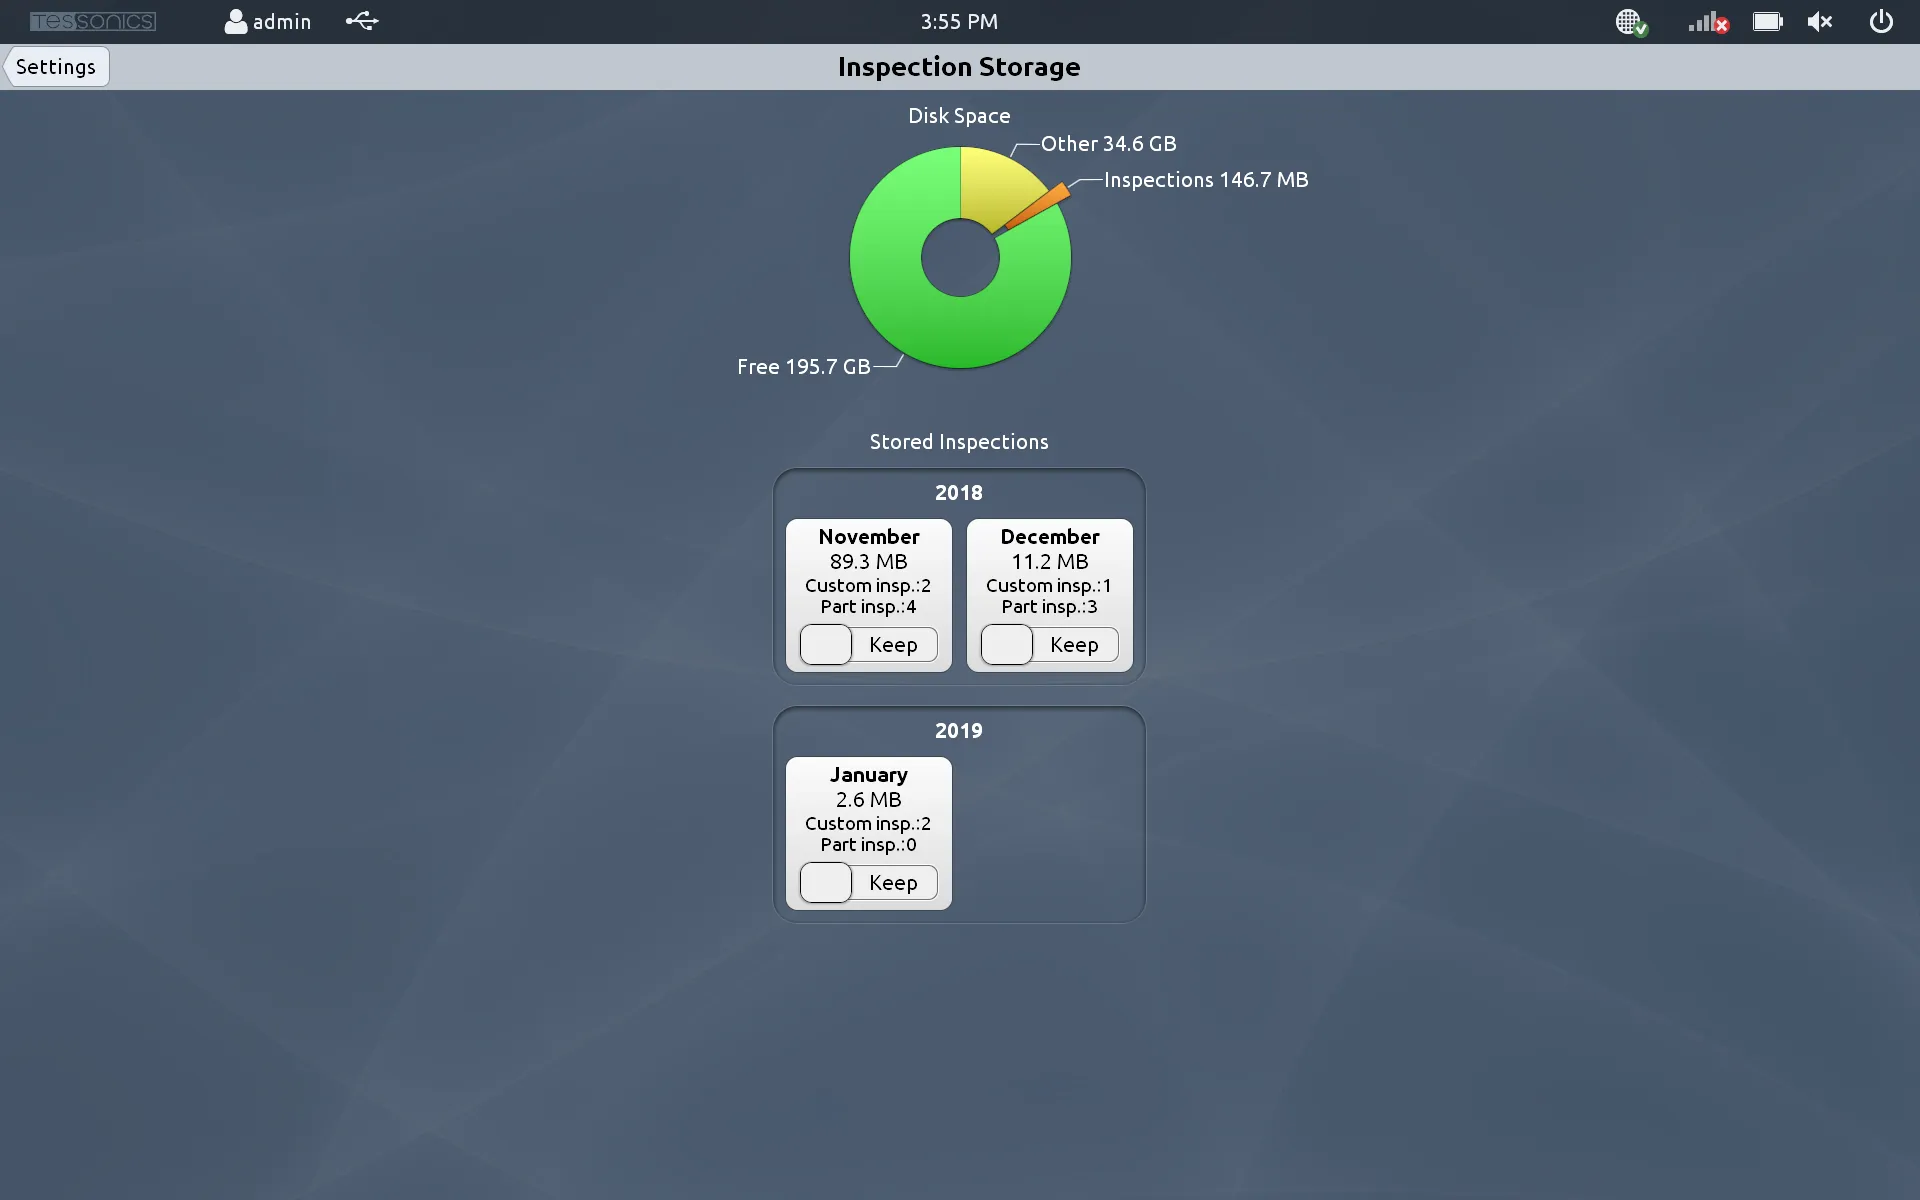
Inspection Storage
This page provides you with a summary of your device’s storage, and allows you to view and delete old inspections to free up hard drive space on the RSWA.
 {min-width=45%}
