RSWA Admin Guide
Tessonics Corporation has made every effort to ensure the accuracy and completeness of this document; however, because ongoing efforts are made to continually improve the capabilities of our products, we cannot guarantee the accuracy of the contents of this document. We disclaim liability for errors, omissions, or future changes herein.
Tessonics Corporation and its subsidiaries reserve the right to make changes, corrections, enhancements, modifications and improvements to its products and/or to this document at any time without notice.
Information in this document supersedes and replaces information previously supplied in any prior versions of this document.
Tessonics and the Tessonics logo are trademarks of Tessonics Corporation.
All other trademarks mentioned herein are the property of their respective owners.
©2007–2024 Tessonics Corporation. All rights reserved.
No part of this document may be copied, reproduced, or translated, without the prior written consent of Tessonics Corporation.
Installing and Updating RSWA Software
This chapter describes how to download and install (or update) RSWA software. By following these procedures you can ensure that your RSWA equipment is up to date with our latest software developments.
You can use these instructions to:
- Update software on existing RSWA units.
- Install or update RSWA software on a PC;
For additional assistance, you can call Tessonics at +1(519)250-4455 or toll free +1(866)440-3313.
To complete these steps, you will need a computer with Internet connection. When updating an RSWA unit, you will also need a USB memory stick with at least 32 MB of memory free.
Downloading the Setup File
On a computer with an Internet connection, open a web browser and navigate to the downloads page of the Tessonics web site.
Select “Download F1 Platinum Software” to download the RSWA software.
Note
RSWA software can also be installed onto the desktop computer. Older versions of RSWA Reporter, Template Designer and Synchronizer are contained in this package.Updating Software on RSWA Units
Copy the downloaded setup file from your desktop computer to a USB memory stick. Unplug the USB memory stick from the desktop computer.
Note
If you are running Windows 2000 or earlier, use the Safely Remove Hardware option before unplugging the drive, otherwise the file may be corrupt.If the RSWA unit is not running, turn it on and wait until the unit boots up. Close all running applications. Log in as either the Admin user or as a user with System Administration permissions.
Note
If your screen does not look like the image below, you will need to manually start the installer (start Windows Explorer; browse to the inserted USB drive; locate and run the setup file; proceed to Initial Setup Stages).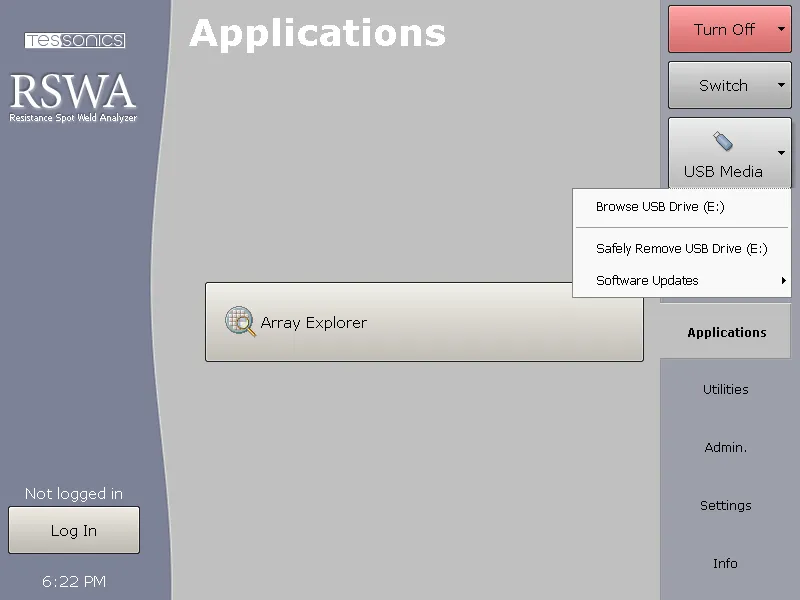 {min-width=50%}
When you plug the USB memory stick into the RSWA, the USB Media button will appear at the right hand side of the Launcher screen (see the RSWA User Guide for information on the Launcher application). If the button does not appear, try to restart the RSWA unit. If this does not help, call Tessonics for assistance.
Click the “USB Media” button, then choose “Software Updates” and select the setup file to update the software. You can also choose “Browse USB Drive” to locate and run the setup file manually.
Installing and Updating Software on a Desktop PC
You can install the RSWA software on a desktop PC or a laptop running Microsoft Windows 2000 or later. After installing RSWA software on a desktop PC, you will be able to perform the following tasks:
- Open and review inspections exported from RSWA units (Reporter)
- Manage Users from a central location (Managing Users)
- Create inspection routes with part graphics (Template Designer)
- Generate inspection reports from collected inspections (Reporter)
- Synchronize information between RSWA units and a coordinator’s PC (Synchronizer)
Note
Before you install or update the RSWA software, make sure all running applications are closed.Locate the downloaded setup file and double click it to run the installer. Proceed to Initial Setup Stages.
Initial Setup Stages
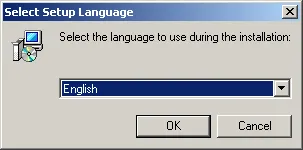
Choosing Language
This setting only affects the language during the installation process. It does not change system or user language preferences.
Choose your language, then click OK.
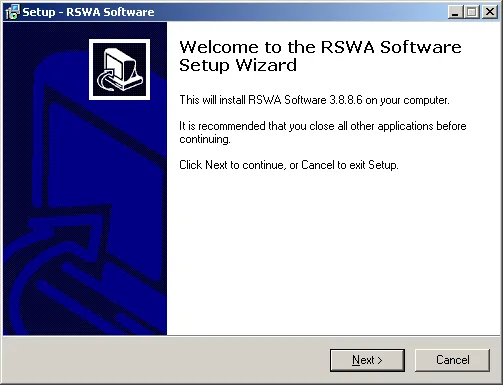
Verifying Software Version
Make sure you are installing the latest version.
Click Next to proceed.
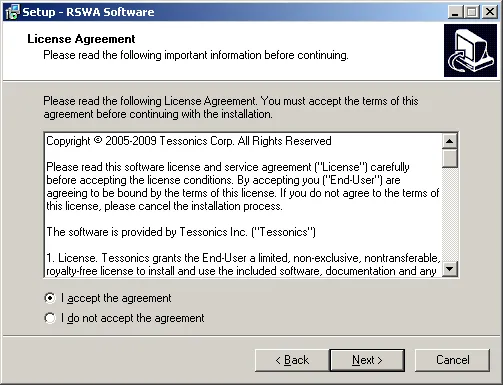
Reading License Agreement
Please review the software license agreement. You will only be able to proceed if you select the “I accept the agreement” option.
Click Next.
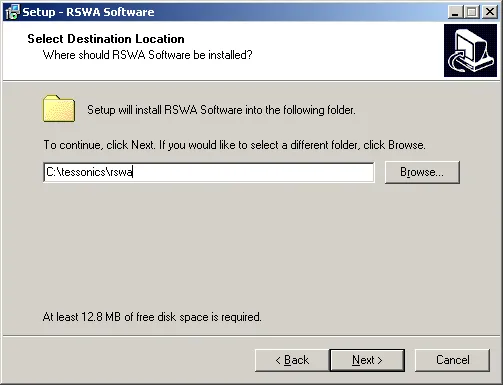
Selecting Destination Location
Choose the directory where RSWA files will be installed. It is recommended to keep the default path C:\tessonics\rswa.
Click Next to continue.
Selecting Components
When installing on an RSWA unit, choose “Installation for RSWA UNits”. If installing on a PC, choose “Installation for Desktop computers”. Then click Next.
Note
When installing on a PC, certain components (e.g. RSWA Launcher) will not be installed.
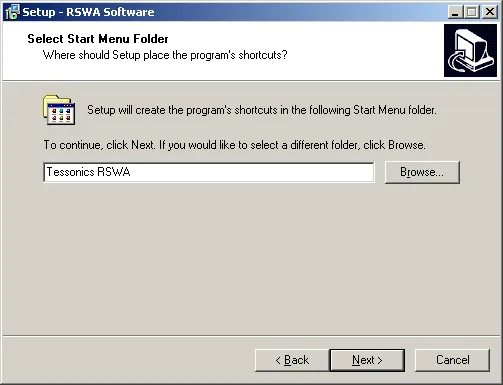
Selecting Start Menu Folder
Accept the default setting here when installing the software on an RSWA unit.
Click Next to continue.
Selecting Additional Tasks
For installation on an RSWA Unit, keep the default options. For the first time, choose “Install Daylight Savings fix” to update some of the internal Windows components. Otherwise, leave unchecked.

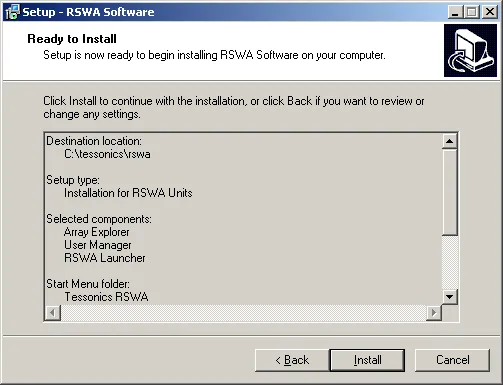
Reviewing Installation Steps
Please review the installation steps, then click Install to continue.
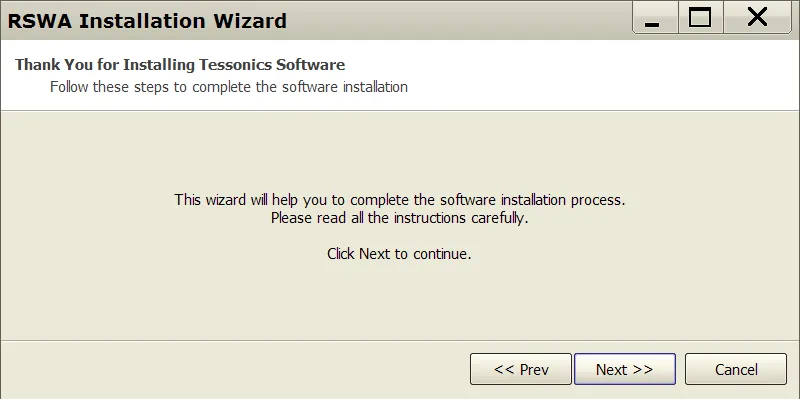
RSWA Software Installation Wizard
The RSWA Installation Wizard runs automatically after the initial setup. This wizard configures the Array Explorer software.
 {min-width=50%}
It is important to completely follow these steps if you are upgrading an RSWA from version 3.5.4 (or older) or when installing RSWA software on a Desktop computer. This wizard will skip through some of the steps if the task described in the step is already complete. (For example, Administrator Password page will not be shown if the administrator’s password is already assigned.)
Click Next to proceed.
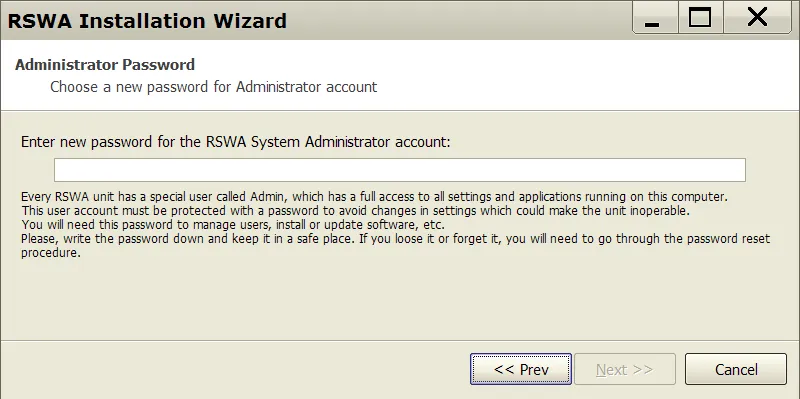
Assigning Administrator Password
Choose a password for the Admin user, and be sure to write it down and keep it in a safe place. If you loose or forget this password, you will need to go through the password reset procedure. For information on the Admin user, see Basic Concepts.
 {min-width=50%}
Note
Choose a reasonably short (but still hard to guess) password. Remember that most of the time you will be entering it using touch screen. It is recommended to use the standard 26 characters from Latin alphabet, and digits. Avoid spaces and characters from other alphabets.Note
RSWA Passwords are NOT case sensitiveChoose Admin password as shown in the previous image, then click Next.
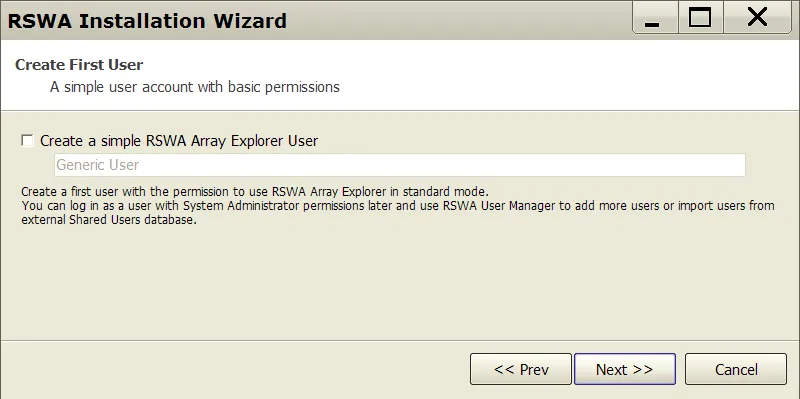
Creating First User
Optionally create a first local user with the permission to use the RSWA Array Explorer in standard mode. You can log in as a user with System Administrator permissions later and use the RSWA User Manager to add more local users. You could also use the RSWA Synchronizer to import shared users from a Coordinator PC.
 {min-width=50%}
This step is only recommended for actual RSWA units, and not Desktop PCs.
Click Next.
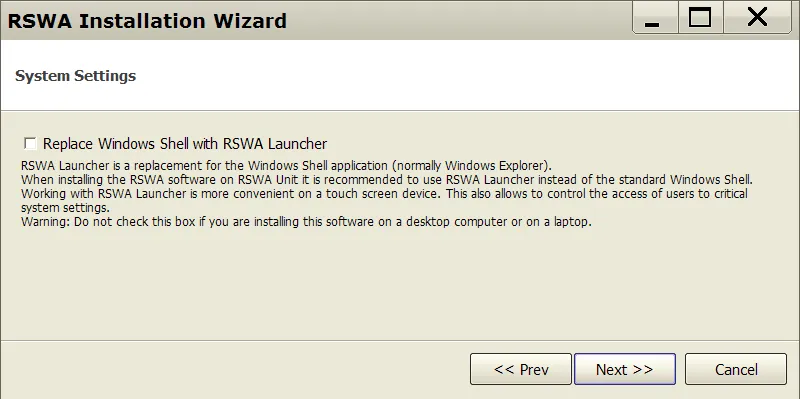
Replacing Windows Shell with RSWA Launcher
It is recommended to leave this option checked on all RSWA units (as shown in the image below). See the “V3 RSWA Software User Guide” document to learn more about the RSWA Launcher.
 {min-width=50%}
Warning
Do not check this box if you are installing this software on a desktop computer or on a laptop!Danger!
If due to some reason you decide to un-install the RSWA software, please use the Launcher to switch Windows Shell back to standard. Otherwise, you could make your system un-bootable.Click Next.
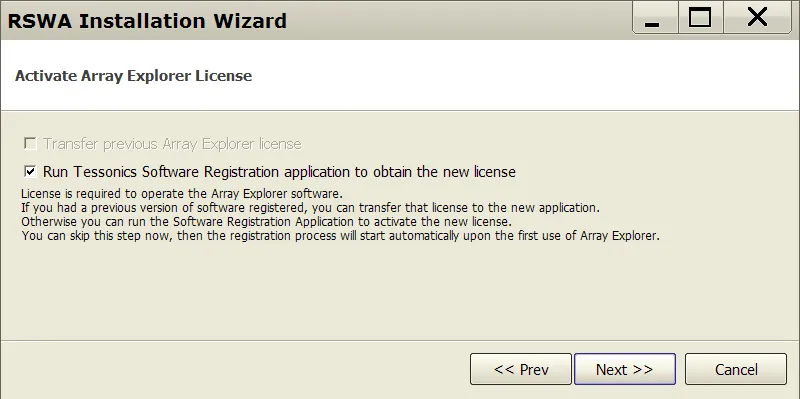
Activating Array Explorer License
A license is required to operate the Array Explorer software. (as shown in the image below) If you had a previous version of the software registered, you can transfer that license to the new application. Otherwise you can run the Software Registration Application to activate the new license. If you skip this step now, then the registration process will start automatically upon starting Array Explorer.
 {min-width=50%}
Choose appropriate options, then click Next.
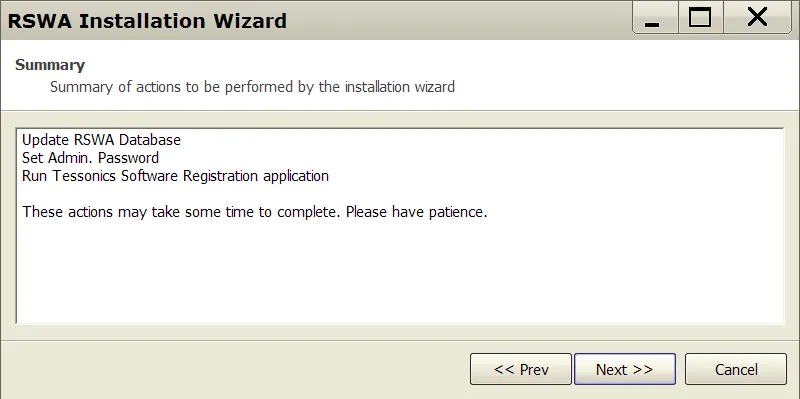
Reviewing Summary
Review the summary, then click Next to complete the installation (as shown in the image below).
 {min-width=50%}
Final Steps
You may need to restart the computer. This completes the software upgrade process.
Please visit our web site regularly for updates to software and documentation.
If you have any comments, questions, or suggestions, please email us at rswa@tessonics.com or call us at +1(519)250-44-55 or toll free +1(866)440-3313.
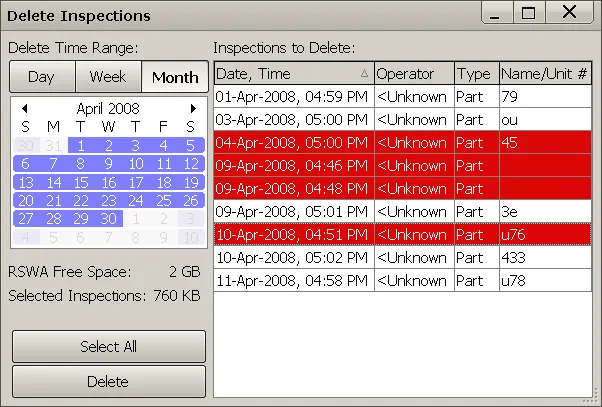
Delete Inspections Tool
The delete inspections tool allows to clean out old inspections from an RSWA unit.
 {min-width=50%}
An RSWA’s hard drive, and can hold thousands of inspections. If you are running out of hard drive space, you will need to delete some of them to make room for new inspections.
To delete inspections, you must log in as the Admin user. Before deleting inspections from RSWA, please ensure that all the inspections have been synchronized to a coordinator’s PC. This way the data isn’t lost, just transferred to another PC.
Warning
Inspections are deleted completely from the hard drive. You will not be able to undo this operation.The left side of the window shows the date range currently selected. By default, the date of the oldest inspection found on the RSWA is selected.
The right hand side shows the inspections that match the selected date range. Selecting an inspection turns it red, and marks it for deletion. Selecting it again will un-mark it, and turn it white.
Once you are satisfied with the selection, press the Delete button.
