Remote
Tessonics Corporation has made every effort to ensure the accuracy and completeness of this document; however, because ongoing efforts are made to continually improve the capabilities of our products, we cannot guarantee the accuracy of the contents of this document. We disclaim liability for errors, omissions, or future changes herein.
Tessonics Corporation and its subsidiaries reserve the right to make changes, corrections, enhancements, modifications and improvements to its products and/or to this document at any time without notice.
Information in this document supersedes and replaces information previously supplied in any prior versions of this document.
Tessonics and the Tessonics logo are trademarks of Tessonics Corporation.
All other trademarks mentioned herein are the property of their respective owners.
©2007–2024 Tessonics Corporation. All rights reserved.
No part of this document may be copied, reproduced, or translated, without the prior written consent of Tessonics Corporation.
A remote is supplied with the unit and allows for operation of the device wirelessly. Once the software has been initialized, the remote allows the operator to perform common tasks. When not in use, the remote is stored in a specialized holder on the back on the device.
Depending on the hardware of the F2 device, you may get one of two remotes.
New Remote
Button Assignments
 {height=40% options=right}

- Perform initial Setup routine

- Perform Get routine for taking a measurement
 or
or 
- Increase/decrease the diameter of the manual circle
 or
or 
- Make a decision on weld quality

- Move to next weld or bond

- Exit from menu or dialog

- Confirm selection in menus and dialogs
 or
or 
- Up and down cursor keys; in Array Explorer’s main window: Navigate up and down in the weld list view
 or
or 
- Left and right cursor keys; in Array Explorer’s main window: Navigate left and right in recent measurements

- Opens drop down menu in A-scan view

- Toggles between front and back side measurement on three plate joints

- Toggles between automatic and manual circle measurements
Pairing
To pair the remote to your specific F2 unit, follow these instructions:
- Power on the F2.
- Position the remote against the front bezel of the unit, ensuring the remote is making direct contact with the bezel (displayed in the image below).
- Press and hold the PAIR button for about 5 seconds until the indicator light on the remote begins flashing.
- The light will flash green and then stop when the remote is finally paired with the F2.
Note
To unpair a remote, hold the PAIR button until the light flashes red.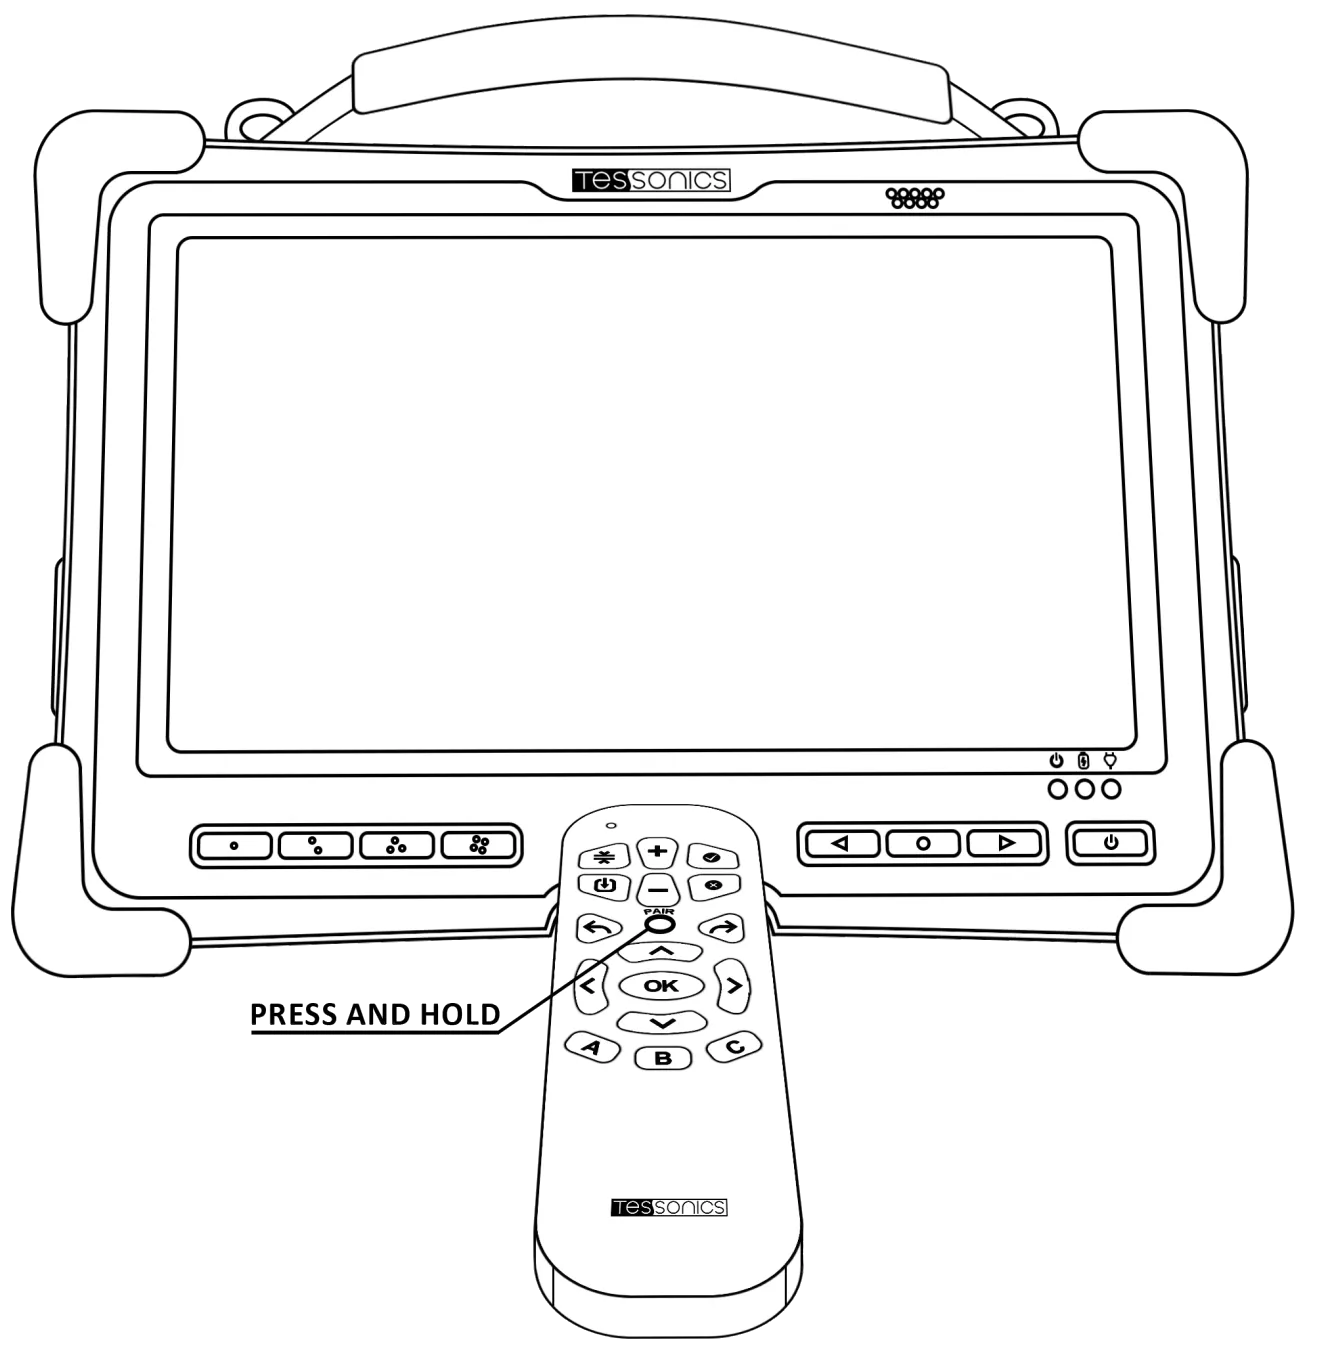 {height=45%}
Old Style Remote
Button Assignments
 {height=35% options=right}
 or
or 
- Perform Setup or Get routine for taking a measurement
 or
or 
- Increase/decrease the diameter of the manual circle
 or
or 
- Make a decision on weld quality

- Move to next weld or unit

- Exit from menu or dialog

- Confirm selection in menus and dialogs
 or
or 
- Up and down cursor keys; in Array Explorer’s main window: Navigate up and down in the weld list view
 or
or 
- Left and right cursor keys; in Array Explorer’s main window: Navigate left and right in recent measurements

- Opens drop down menu in A-scan view

- Toggles between front and back cells in weld list view

- Toggles between automatic and manual circle measurements
Pairing
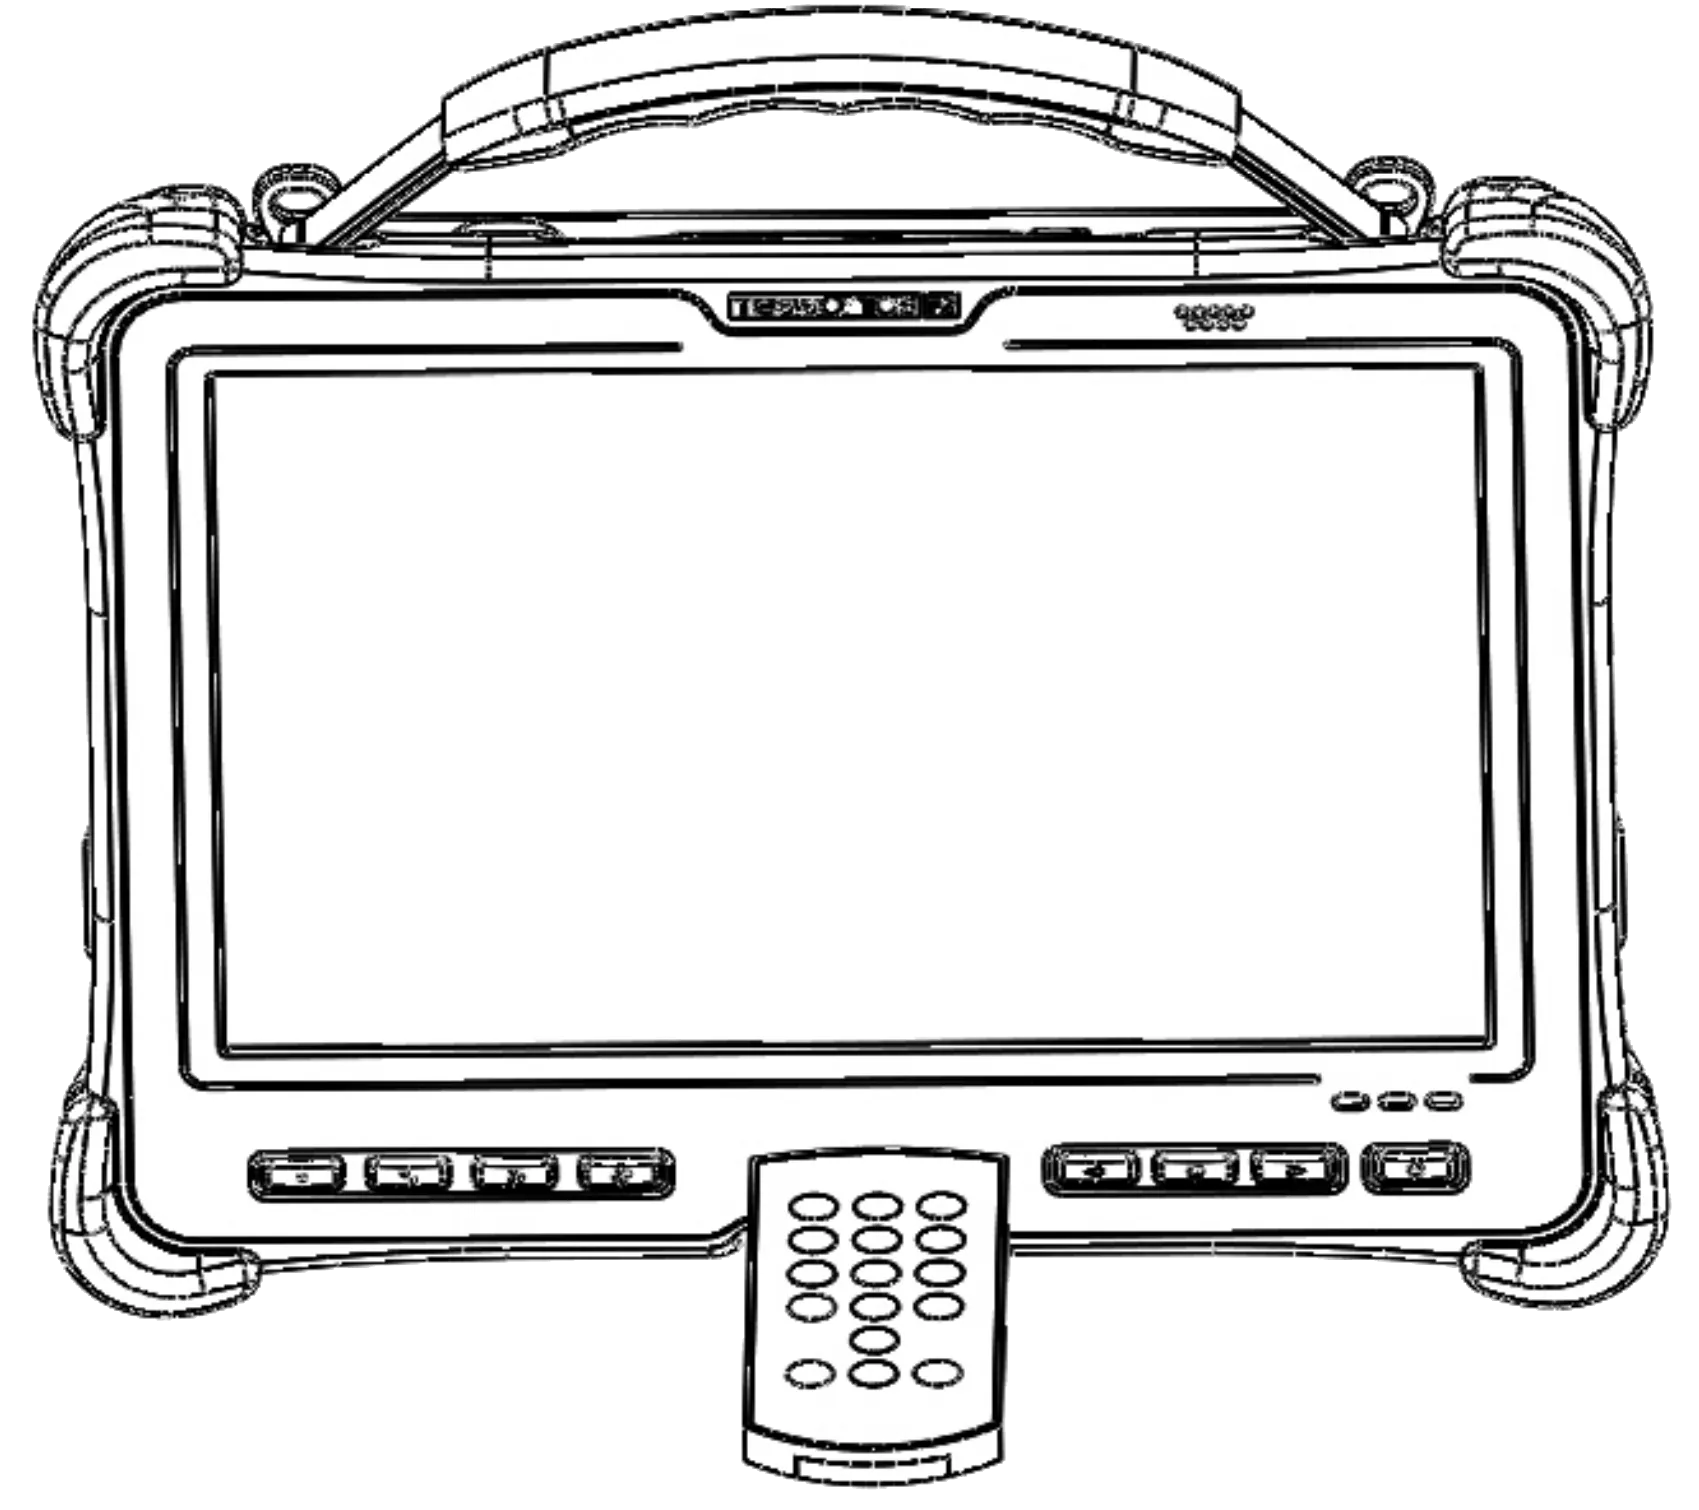
To pair the remote to your specific F2 unit, follow these instructions:
- Power off the F2 and remove both batteries for at least 10 seconds.
- Remove the battery from the back of the remote for 10 minutes.
- After the 10 seconds has passed, reinsert the batteries back into the F2.
- Power on the F2 and open Array Explorer.
- After 10 minutes has passed, reinsert the remote battery.
- Press on the remote for about 5 seconds while holding it in front of the F2 (as shown in the image below).
- The remote should now be paired with the F2.
 {height=45%}
